Section 7: Big Project Time
To recap, we are now done learning about the general structure of Nest.js and have looked at the importance of inversion of control principle as well as how to use dependency injection. Now, let’s start a small project to practice what we’ve learned so far. Here is the outline:
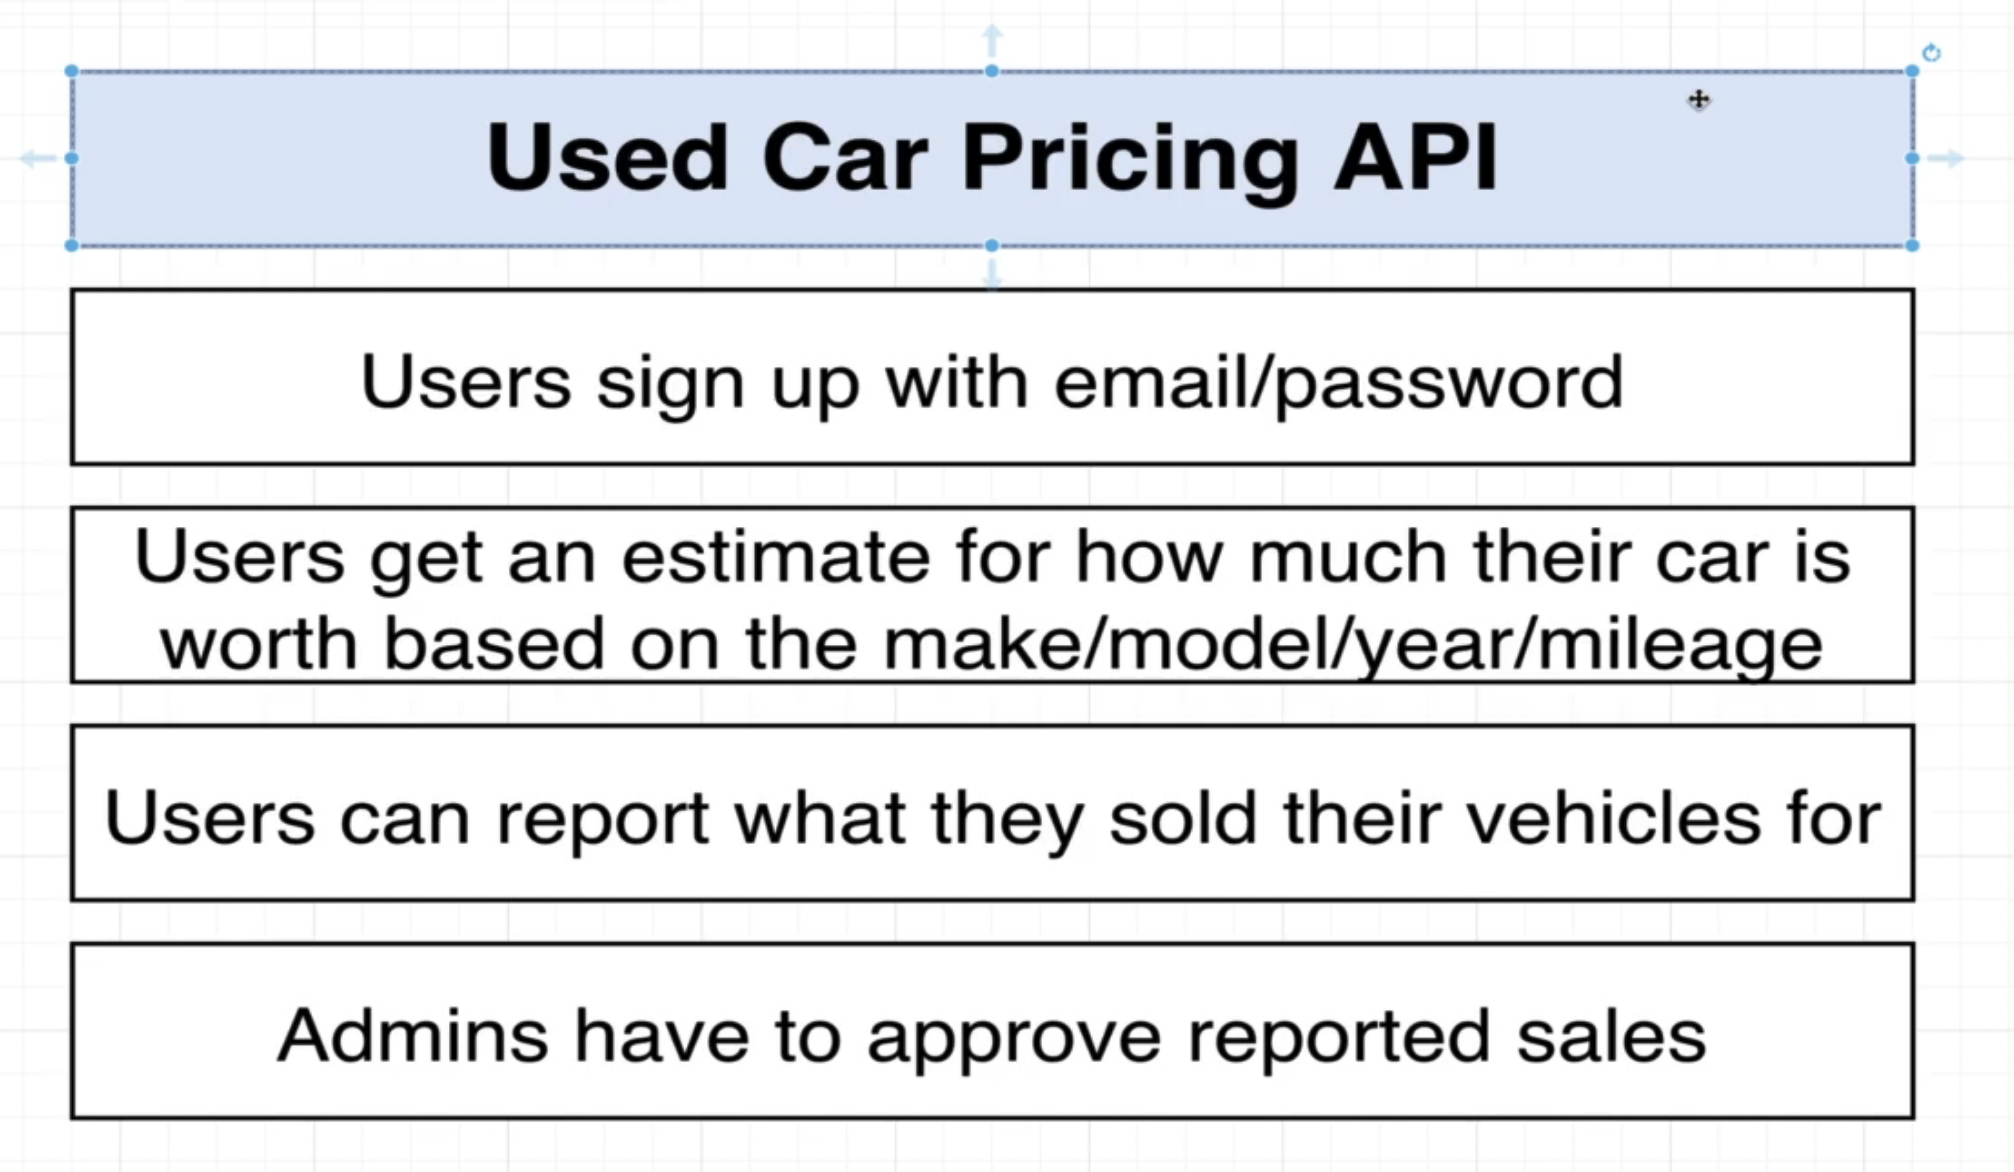
To implement this project, here is an API design we can follow:
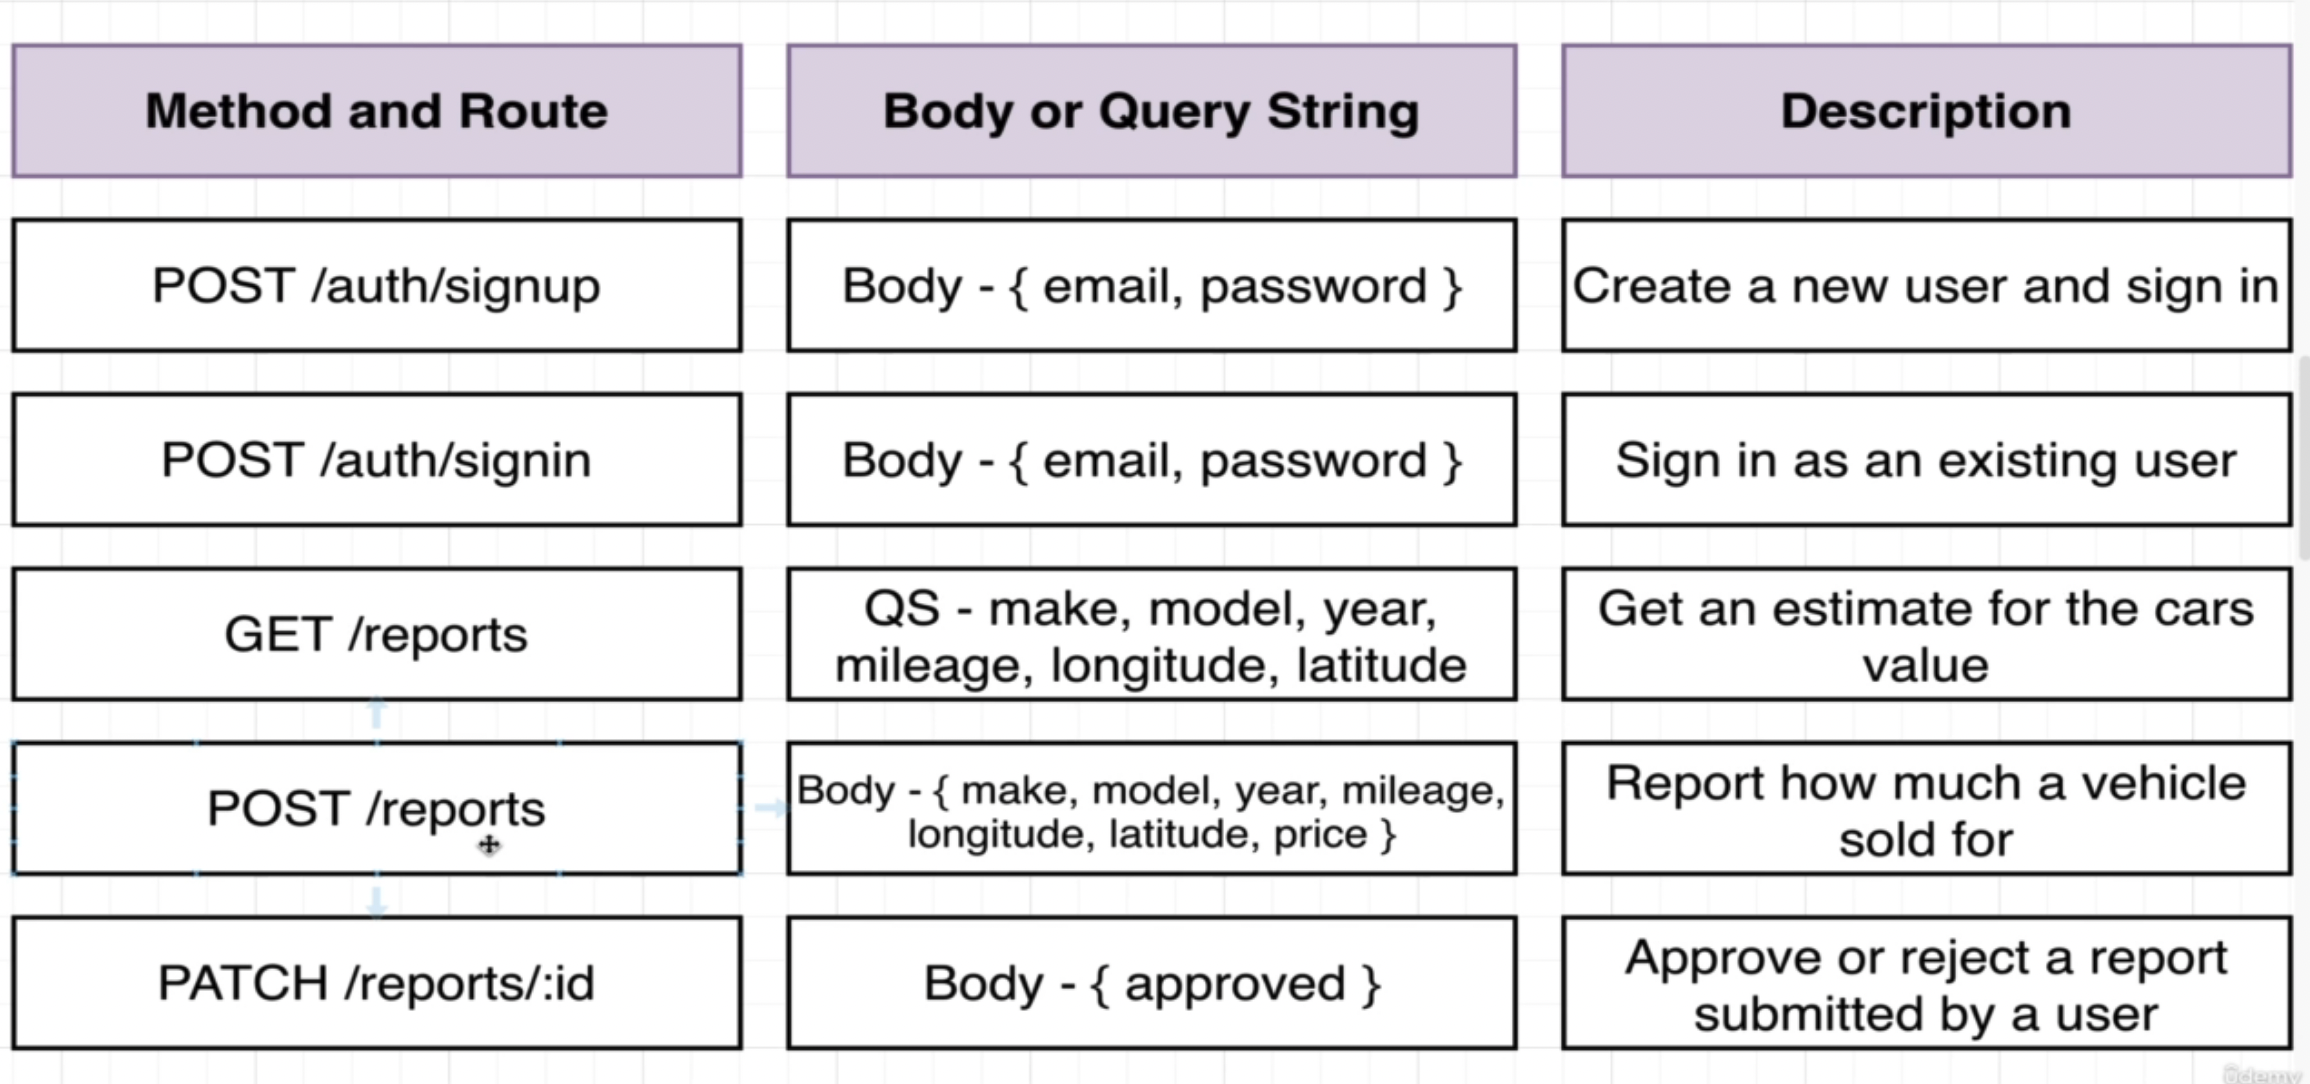
Ok, so this is a good area to learn from. After first thinking about what we want our application to be able to do, we first defined the API. Now, from there, we can generalize the calls into two main categories: Users and Reports. So, from here, we can construct the module’s for each of these.
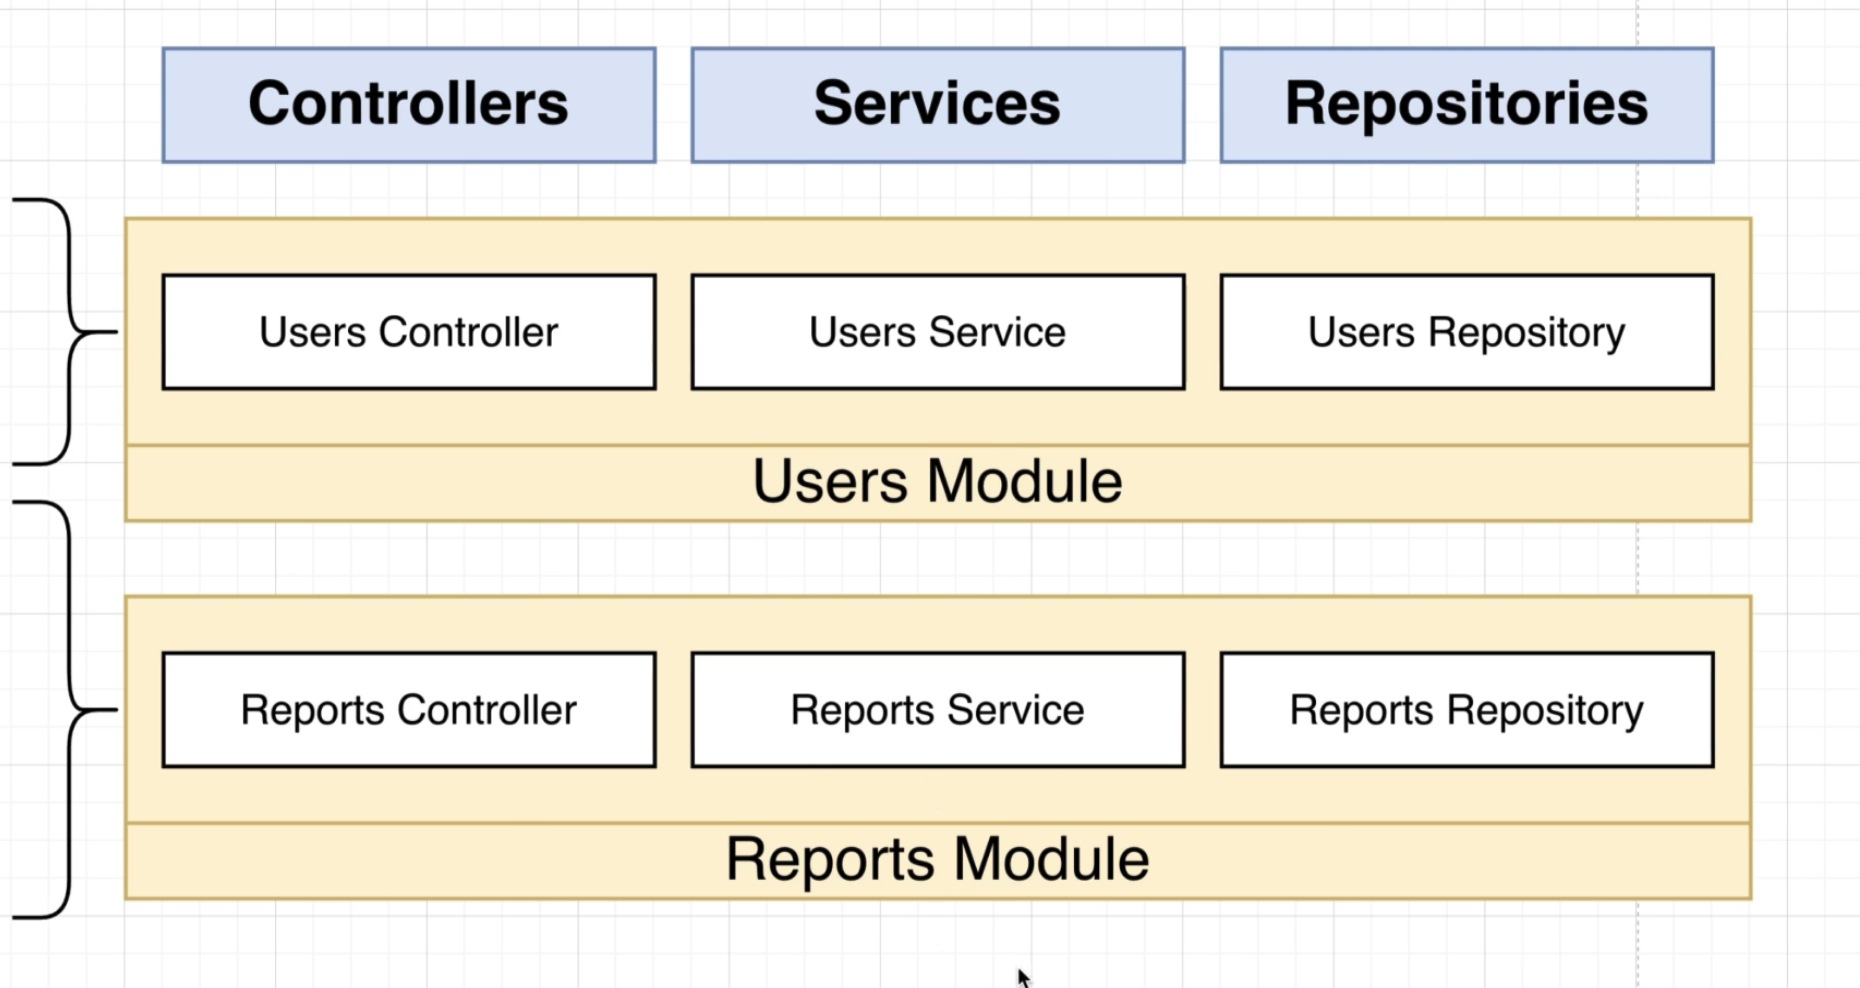
Now, after we’ve generated the controllers and services, we now look at how to create our repository. For this, we need to step back, and look at a new topic.
Section 8: Persisting Data with TypeORM
Now, we never store data in plain files. We make use of databases. When using databases with Nest, there are many things we need to know. Before that, let’s provide some definitions:
⇒ ORM
- Object-relational mapping is a technique for storing, retrieving, updating, and deleting from an object-oriented program in a relational database
So, an ORM, is a framework that sits between out OO program and the relational database. Below is a perfect illustration of what it is doing. We have our objects in our OO language, now, we want to save it in our database. So, we call on the ORM (Data Layer) to save it for us, which it then calls some SQL commands to insert our entry into the table.

Now, Nest works fine with any ORM, but there are two solutions that work particularly well:
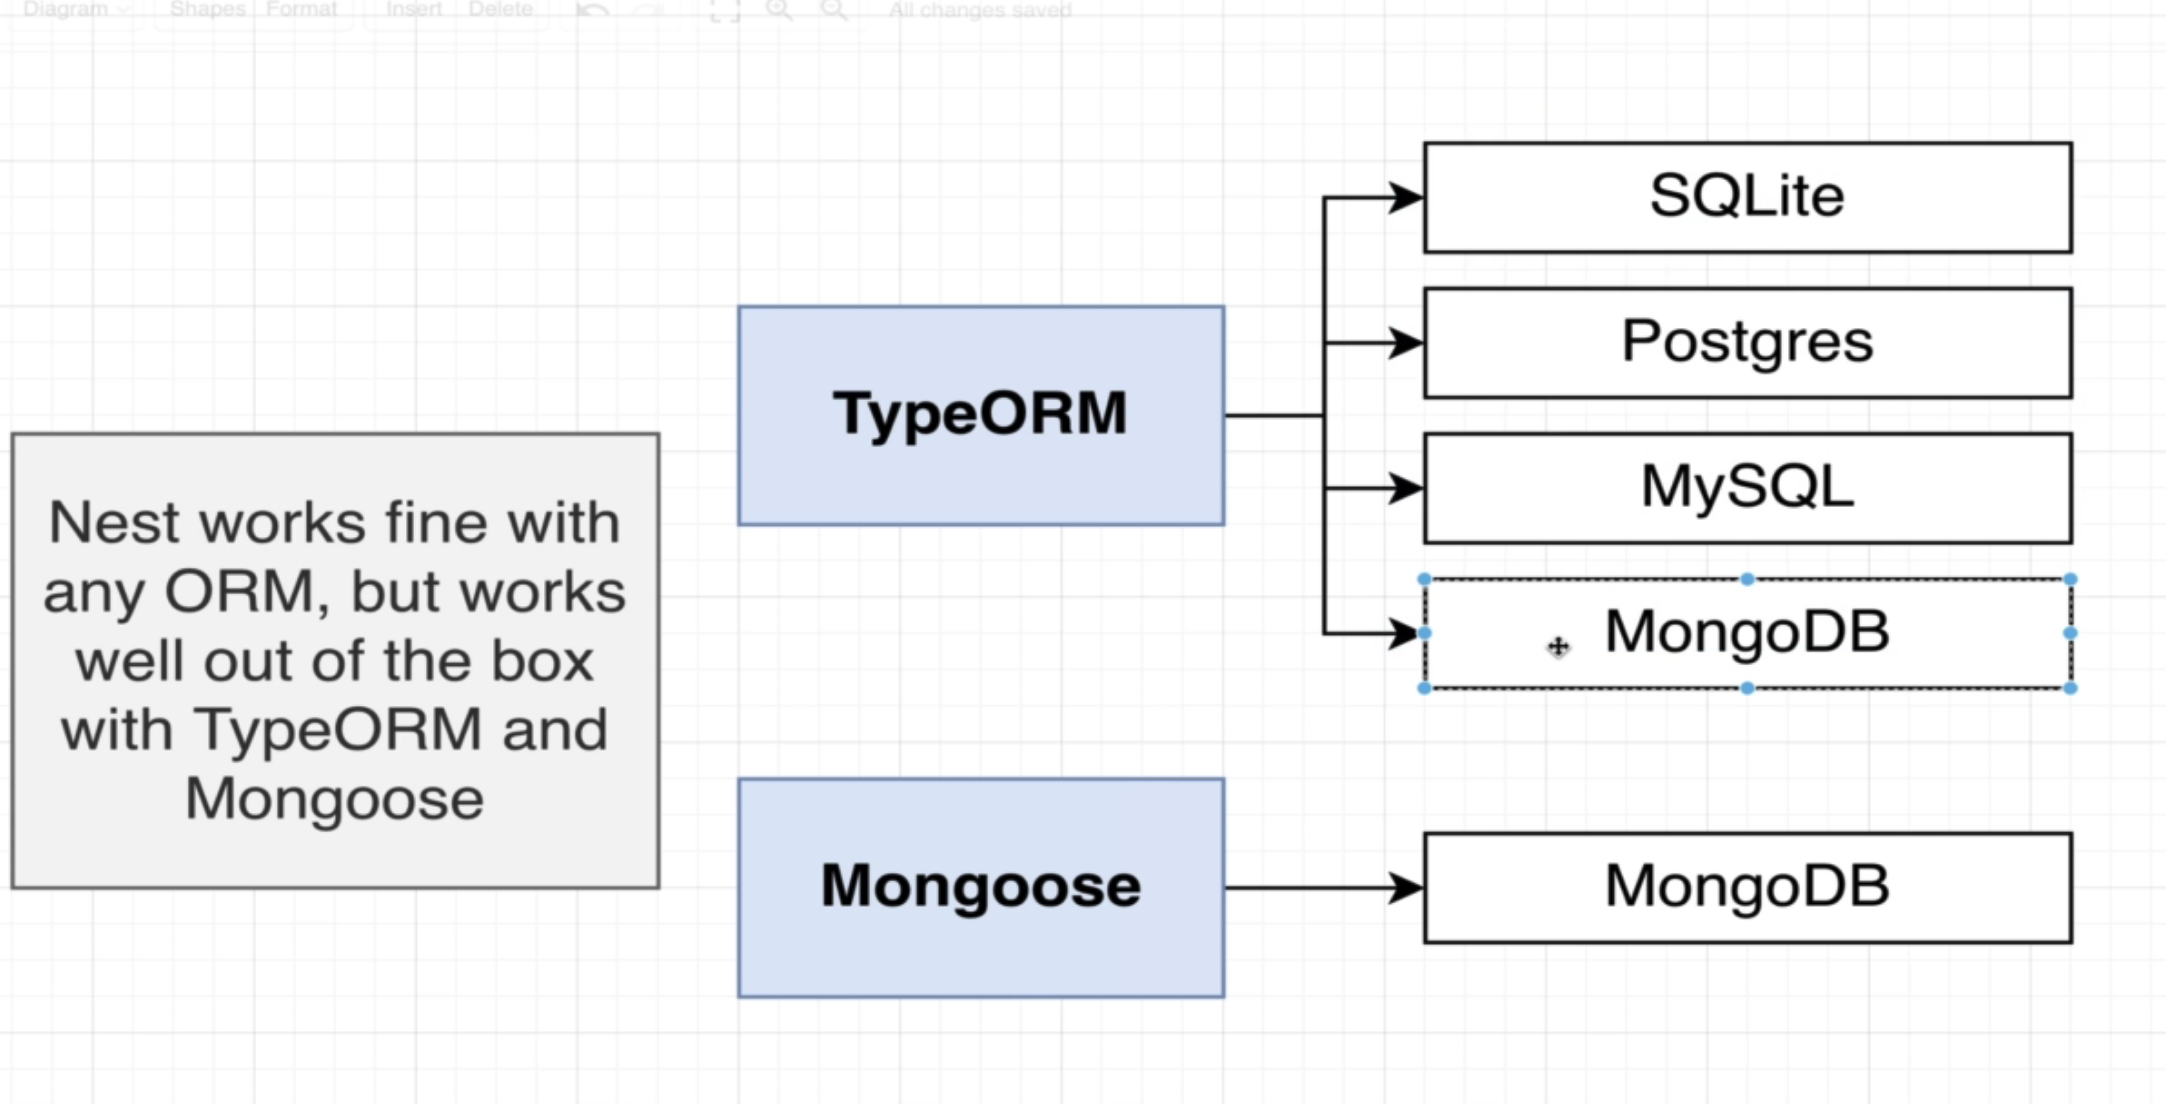
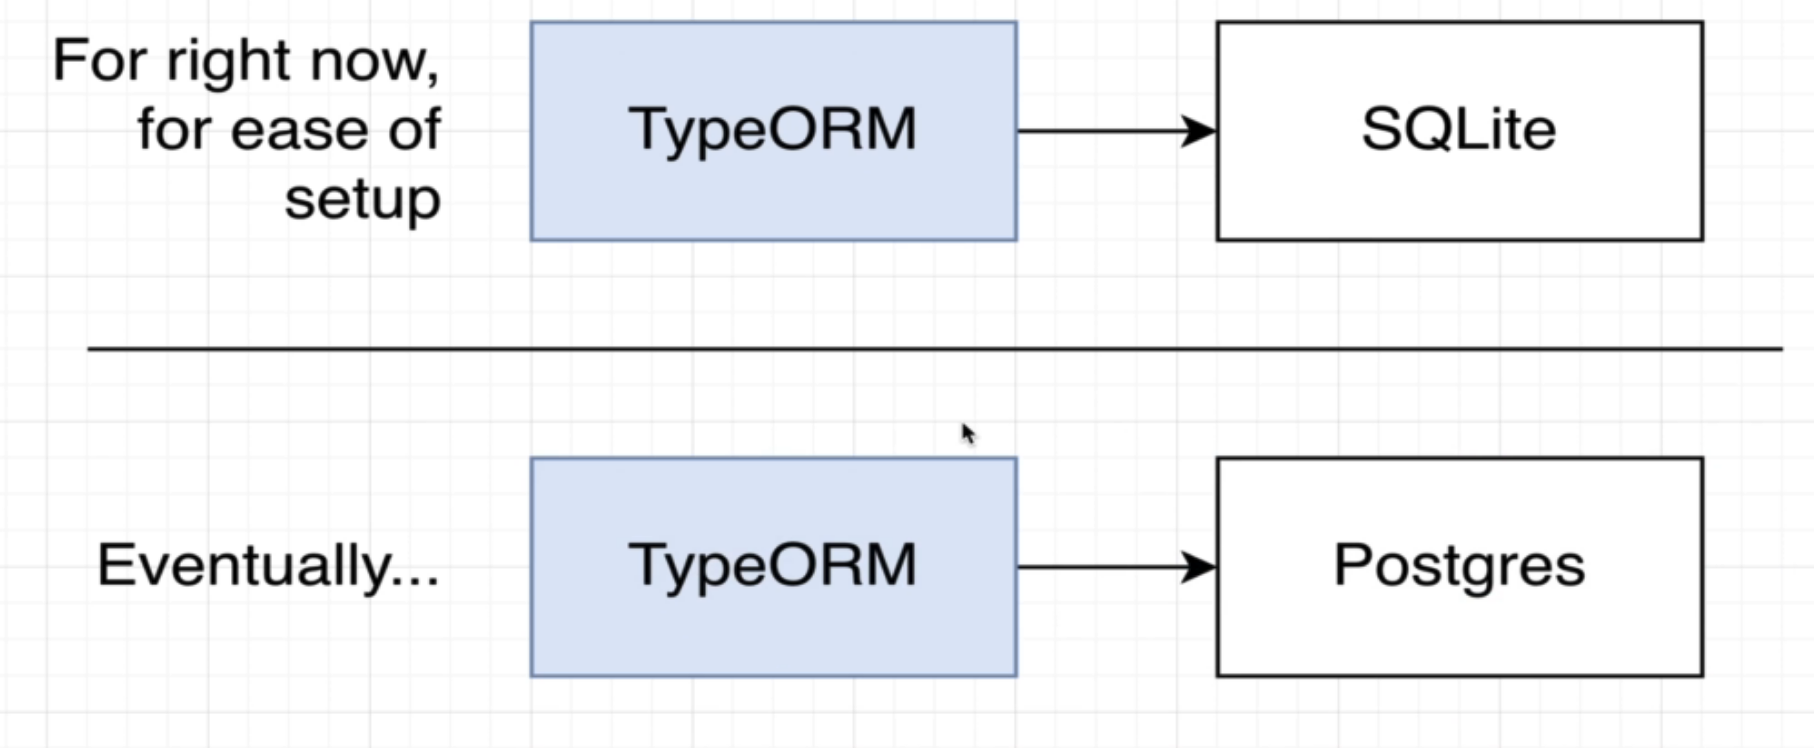
TypeORM is a library that ca interface nicely with a variety of databases. Not only does it work well with traditional SQL databases, but also NoSQL database like MongoDB. We’ll use TypeORM as it works the most fluid with Nest. For now, we’ll use SQLite, but later on, look more into Postgress.
Here are some of the things we now need to install:
npm install @nestjs/typeorm typeorm sqlite3⇒ Setting up the database
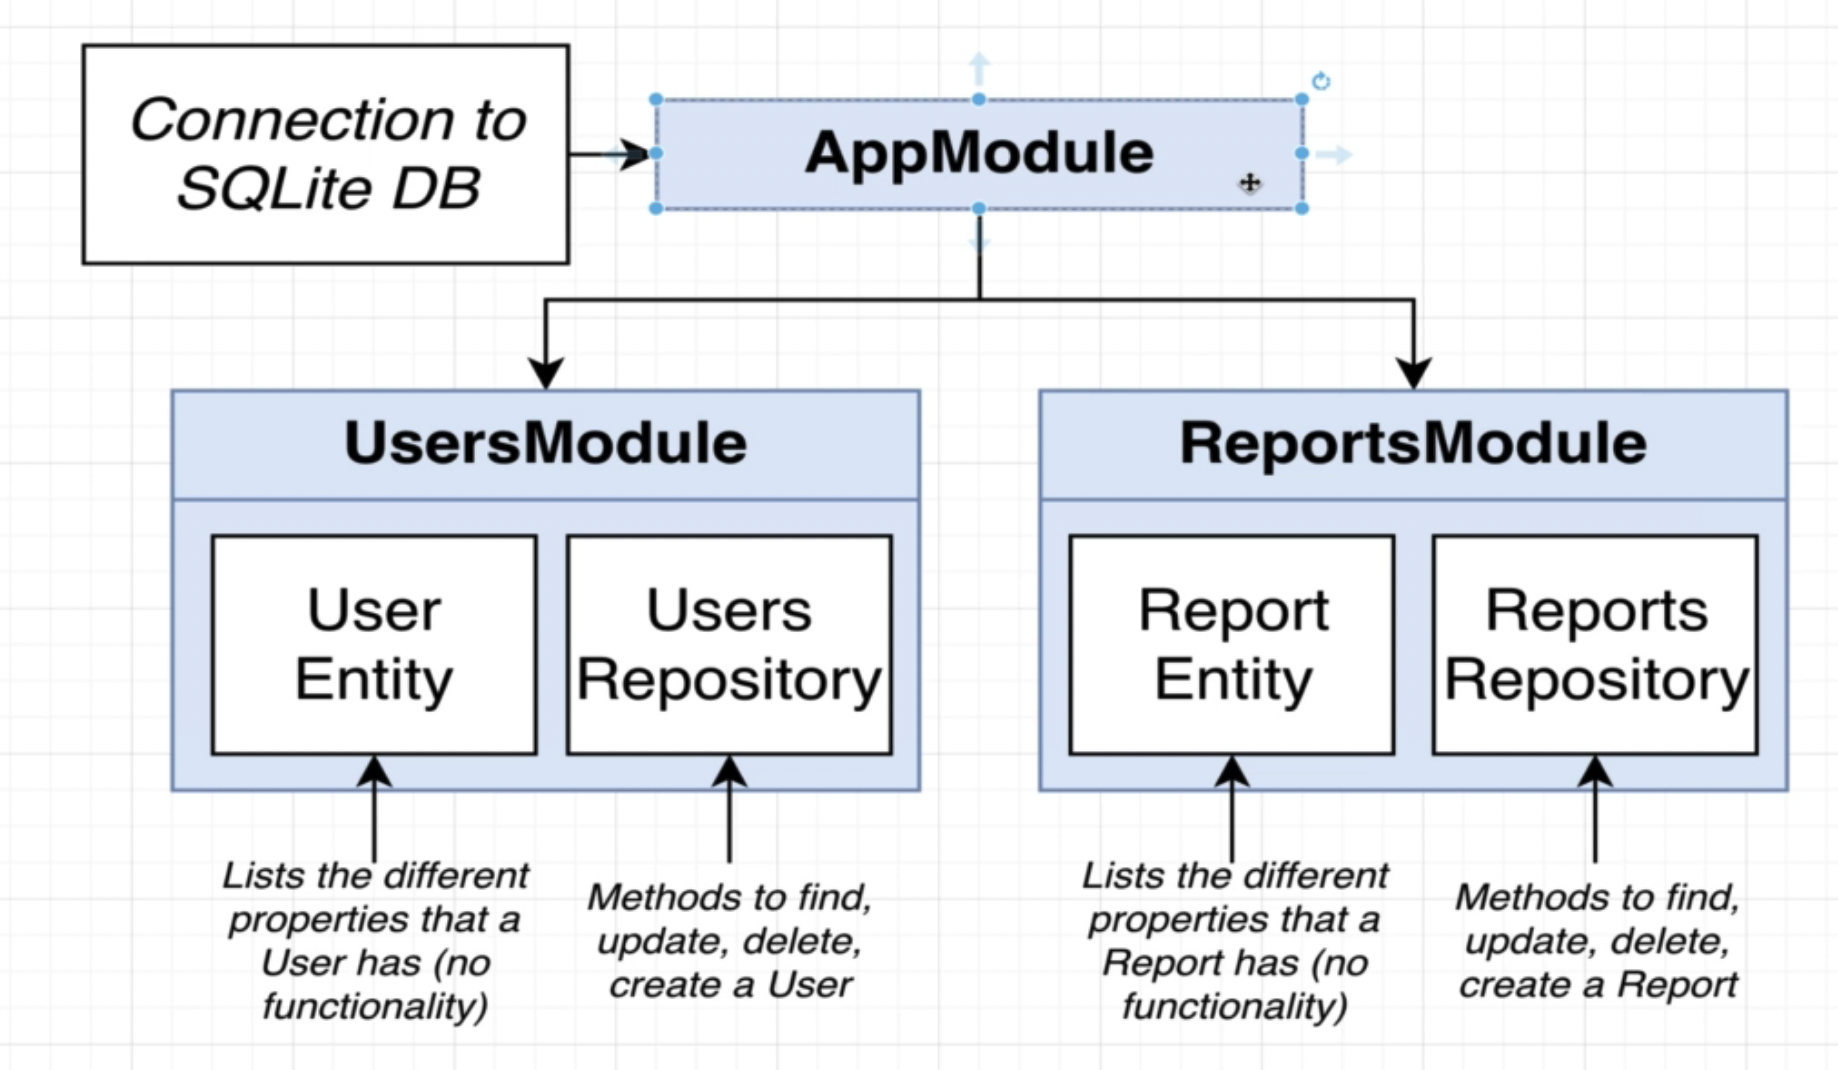
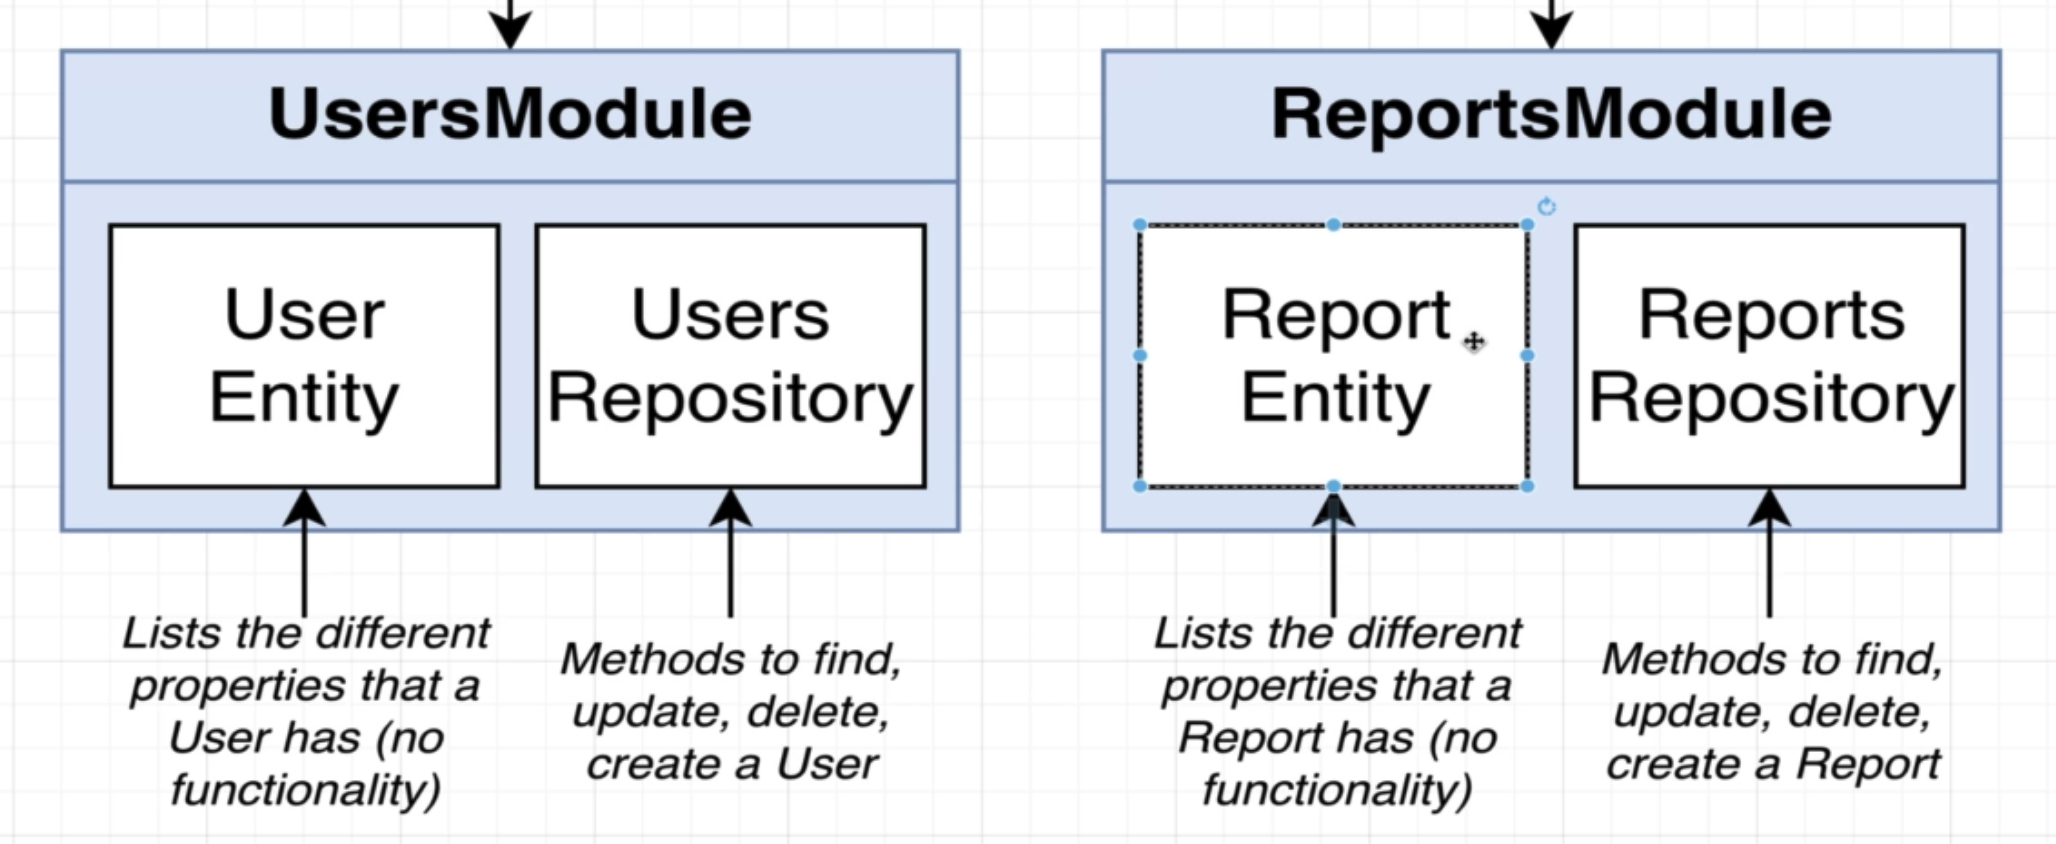
So, the above diagram is an example of how we connect. So, upon generating our Nest application, we had our AppModule created initially. Now, by connecting this to the SQLite DB, it trickles down to the UserModule and the ReportsModule, so both of them will automatically have a connection to the DB as well. The interesting part are the introduction to entity files:
⇒ Entity Files (Models)
An entity is very similar to a model, it is a skeleton of what we expect the data to look like.
We not adjust the app.module to include the following:
imports: [UsersModule, ReportsModule, TypeOrmModule.forRoot({
    type: 'sqlite',
    database: 'db.sqlite',
    entities: [], // entities go inside here
    synchronize: true
  })],
So, by doing this, we specify we use SQLite and TypeORM, and now, a file will be generated inside of our project, which will contain the raw data of the database. This is because we are using SQLite. Of course, having such data in the project is not good, but for the purpose of learning, it is perfect. It will be encoded, however, so unreadable, but there are tools we can use that can help us.
⇒ Creating an entity and repository
We don’t need to make repository files, as by defining these entities, Nest and TypeORM auto create the repositories for us. So, how can we create an entity? Here is a roadmap:
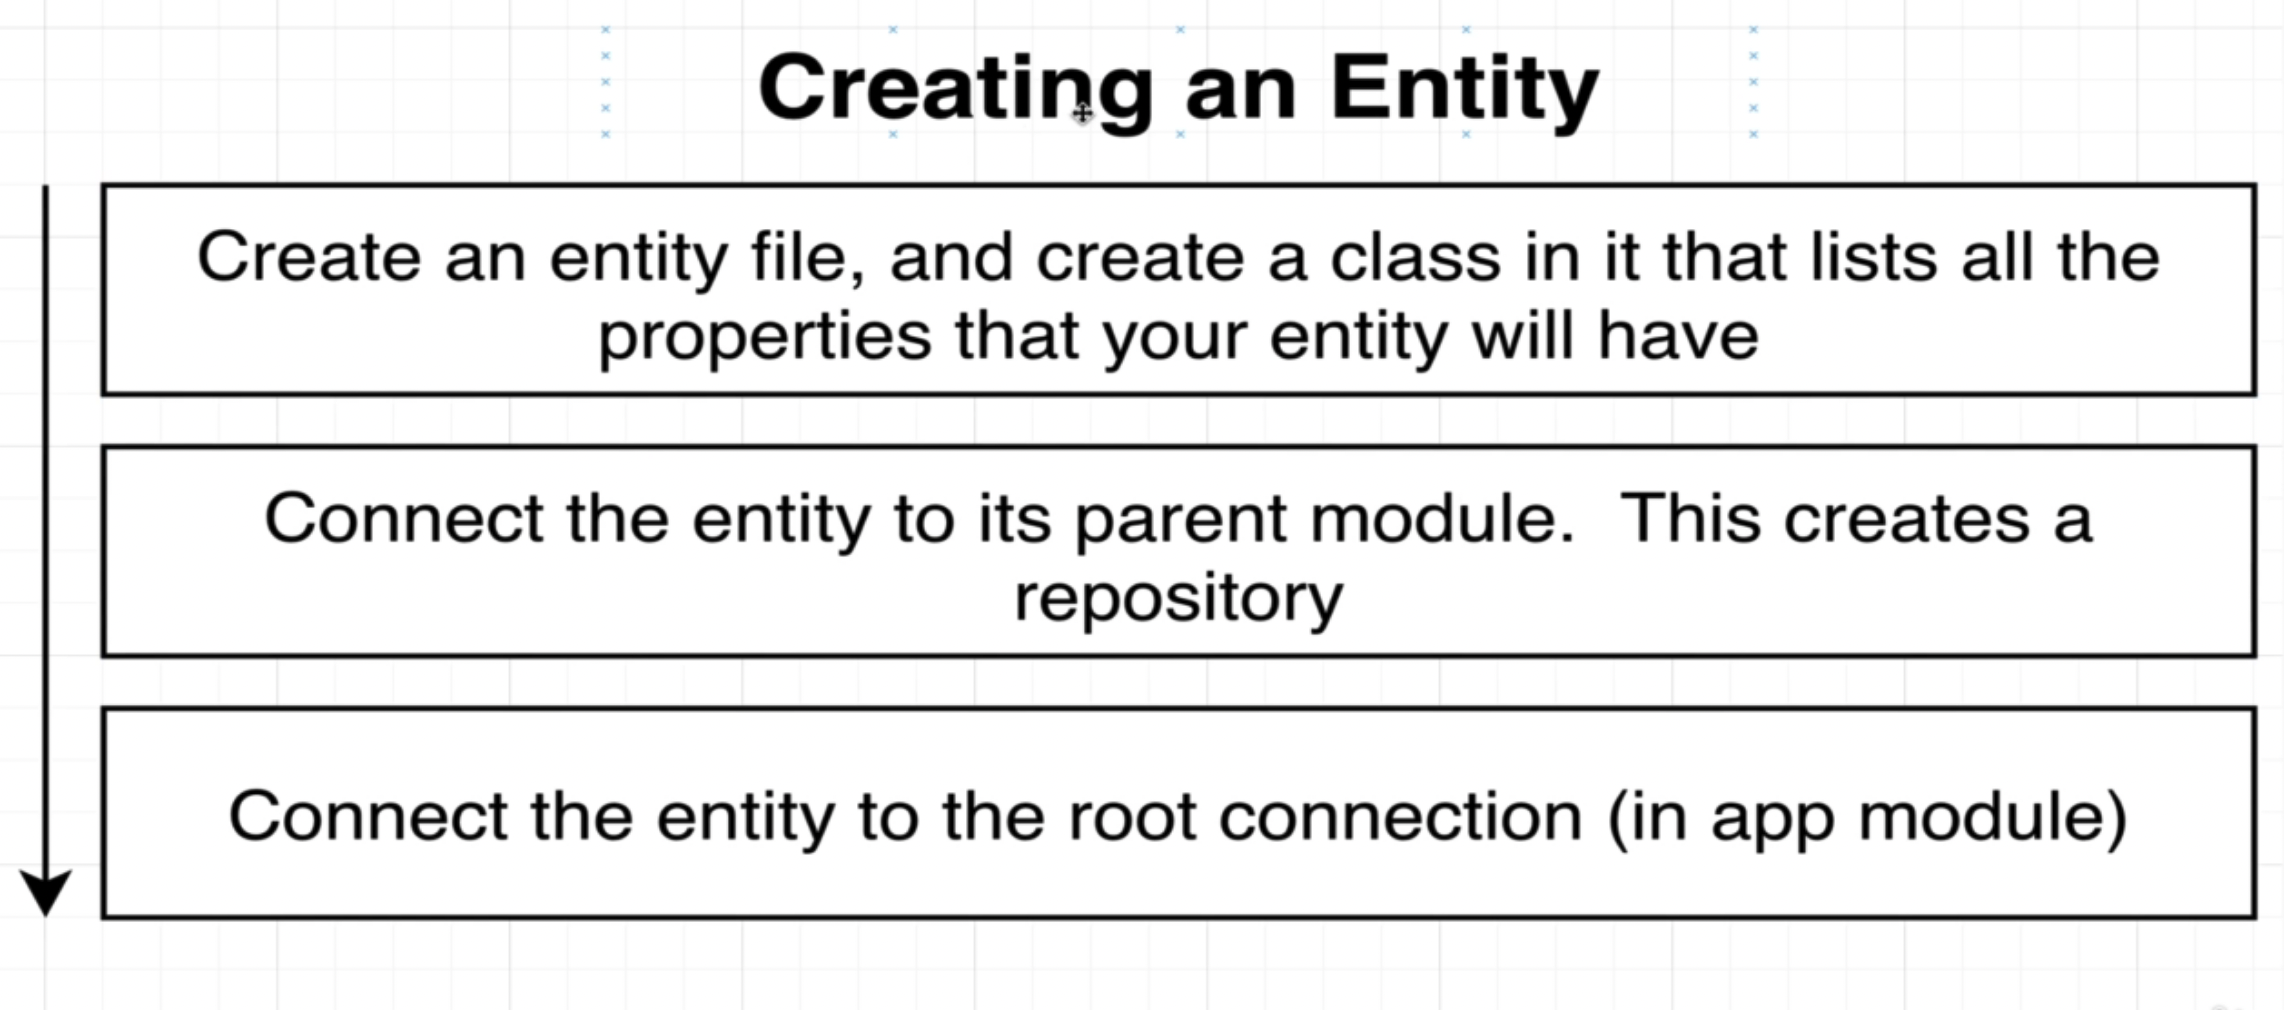
Now, we follow those steps. Here is what an entity file looks like:
import { Entity, Column, PrimaryGeneratedColumn } from "typeorm";
@Entity()
export class User {
@PrimaryGeneratedColumn()
id: number;
@Column()
email: string;
@Column()
password: string;
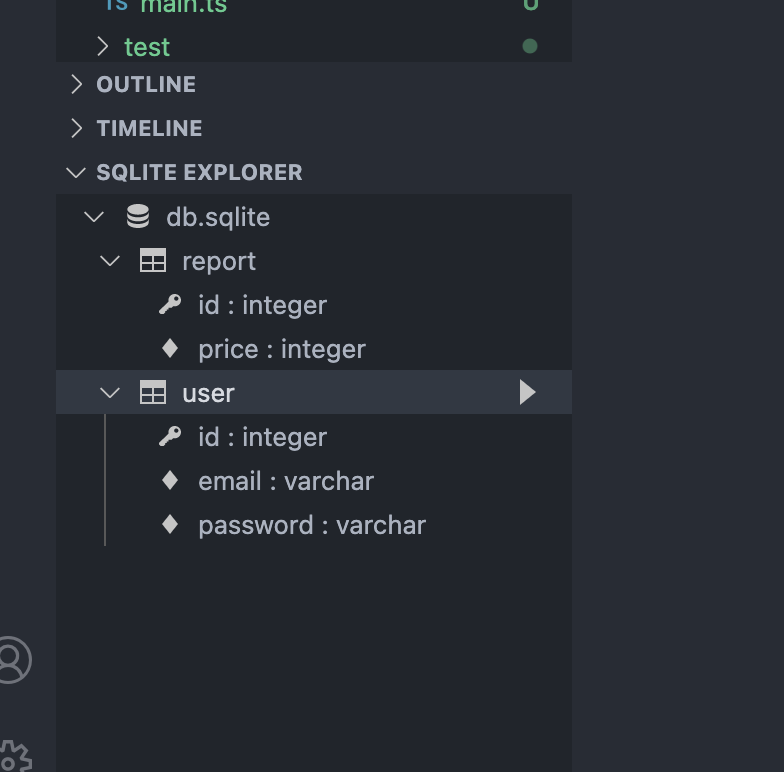
}Then, we will import this in both the Users Module and App Module. In addition, to visualize our database, we install the SQLite extension in VSCode. This allows us to see our database data:
⇒ Understanding TypeORM code
We just used a lot of TypeORM code and related things. Now, let’s take a look at what the code does (decorators, etc.)
→ TypeORM Decorators