Section 4,5:
Now, to begin learning other new things, we begin a simple “messages” application. We will simply retrieve and post data to a static JSON file.
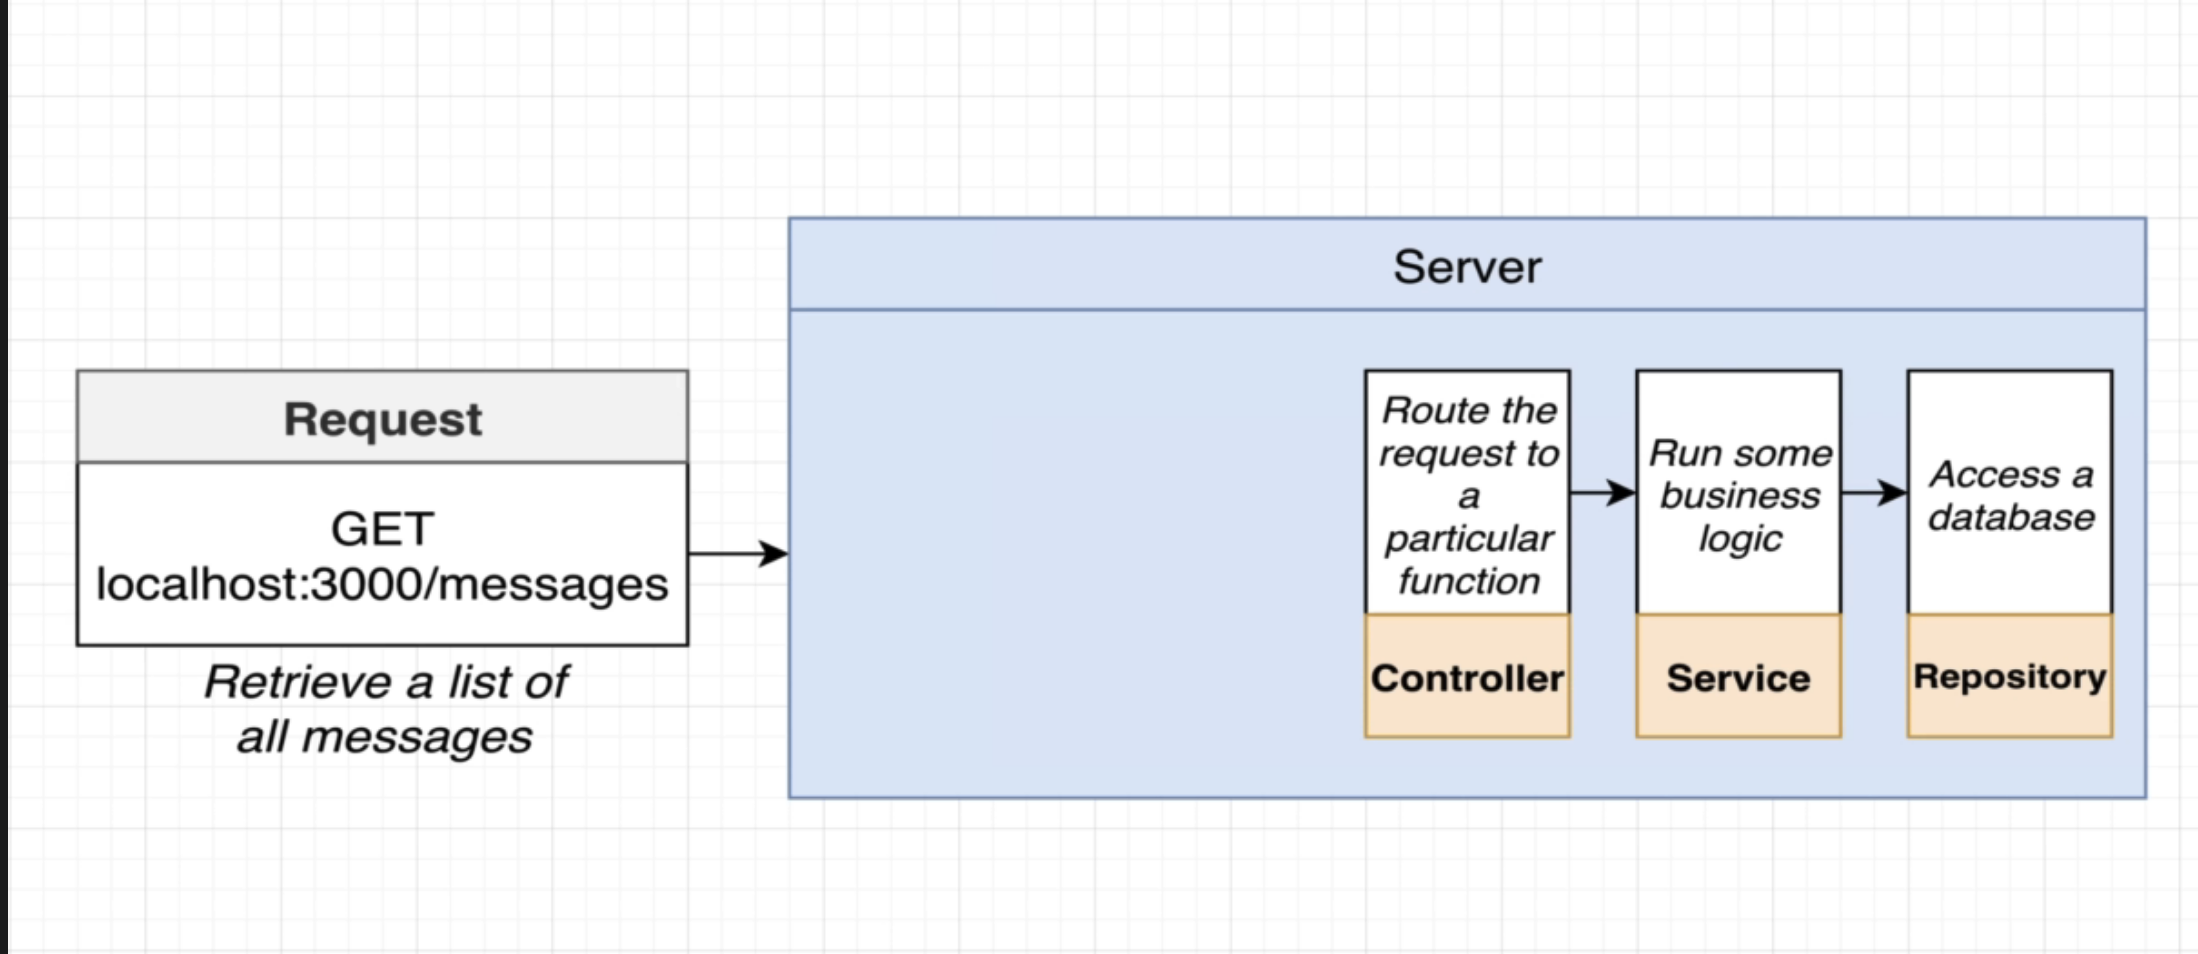
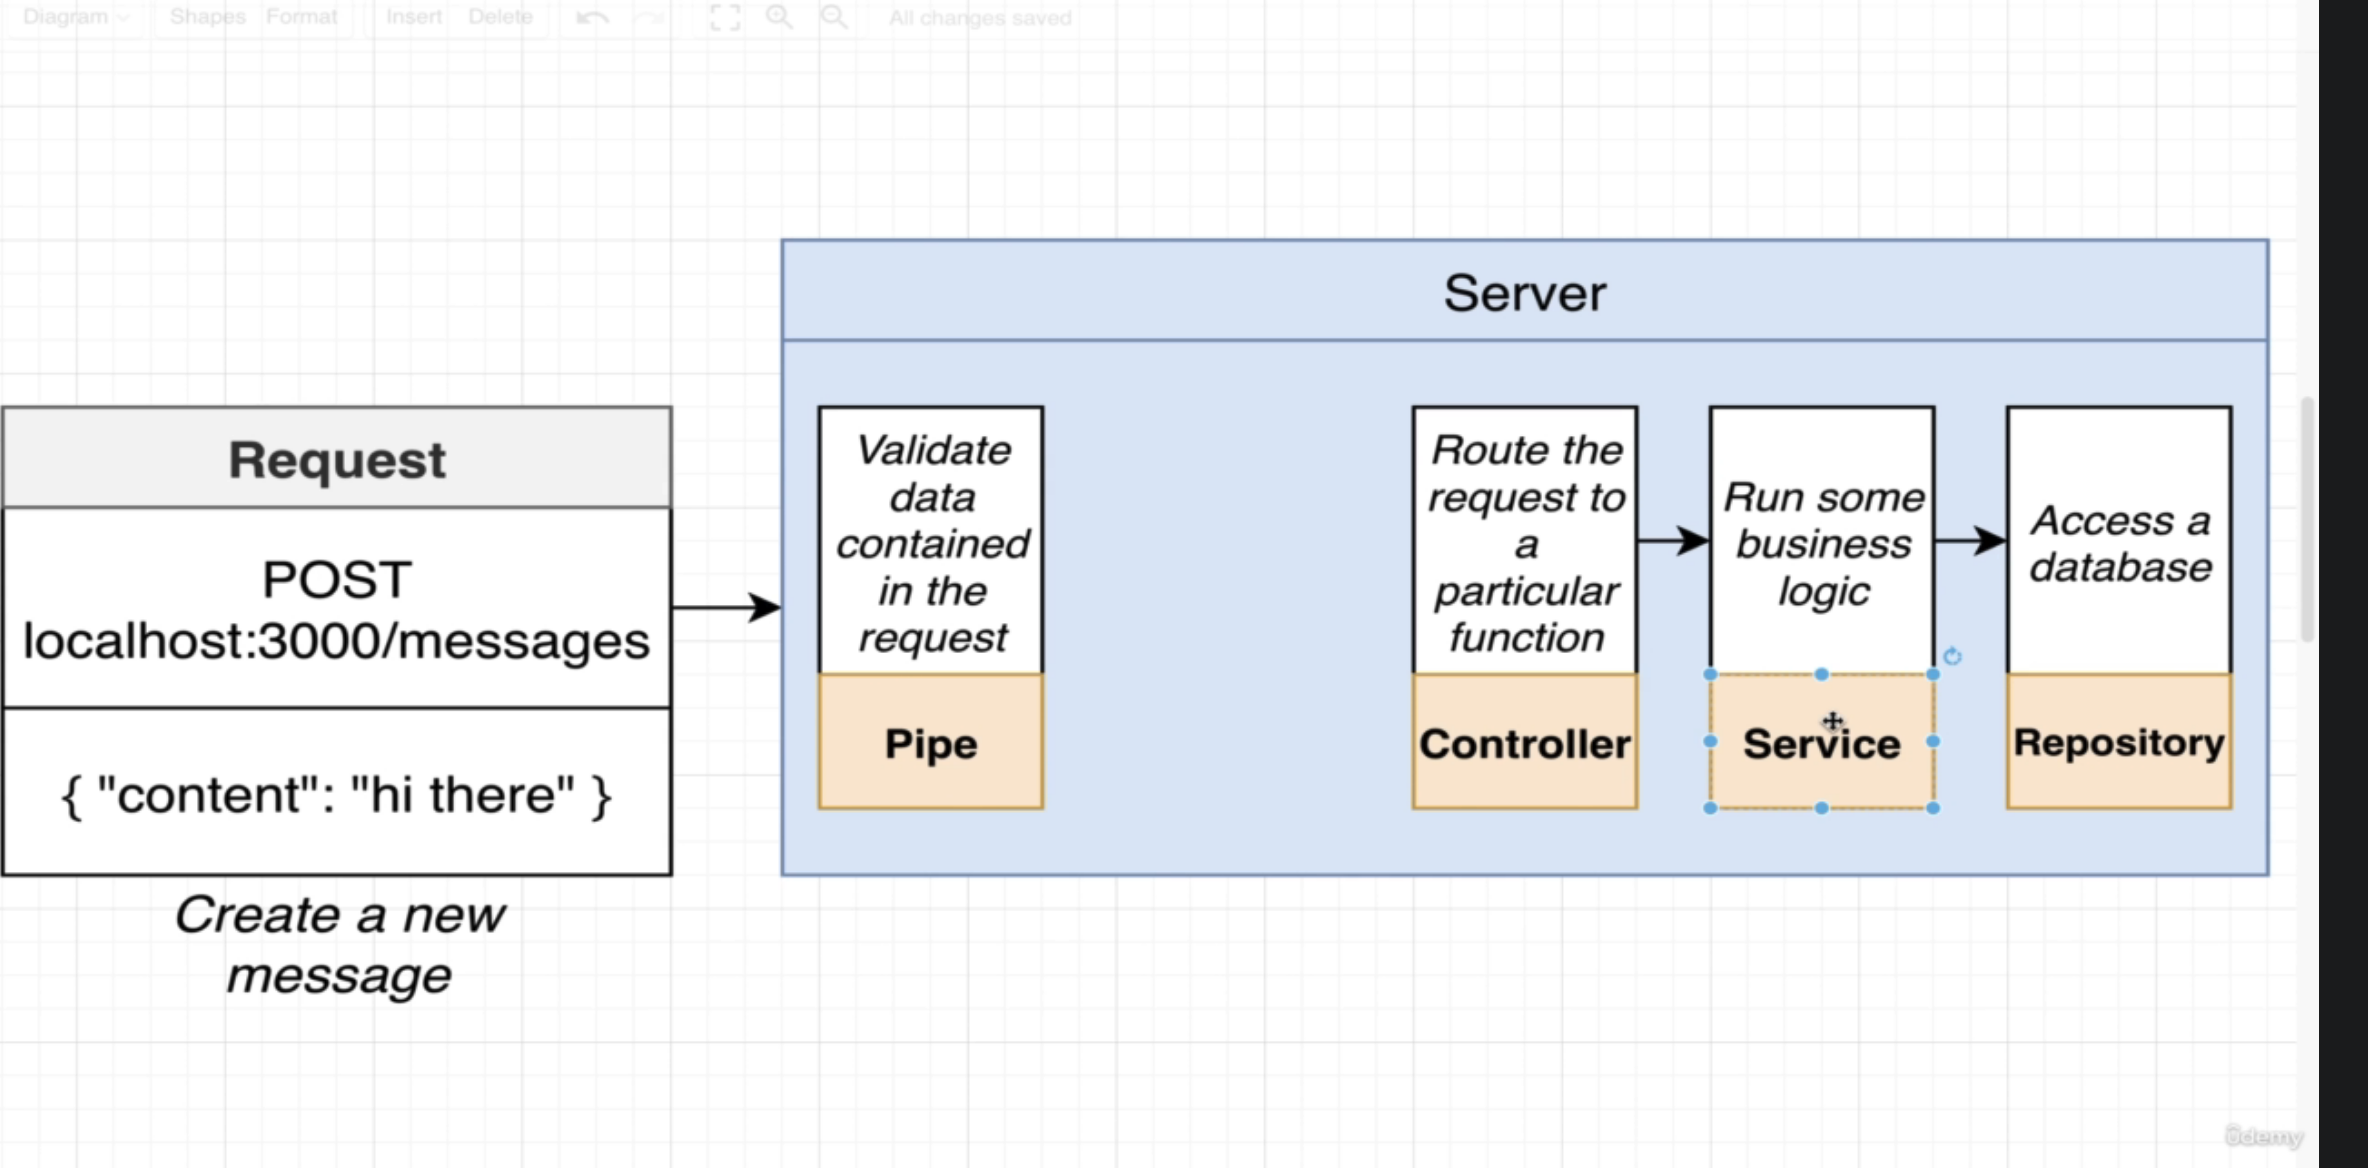
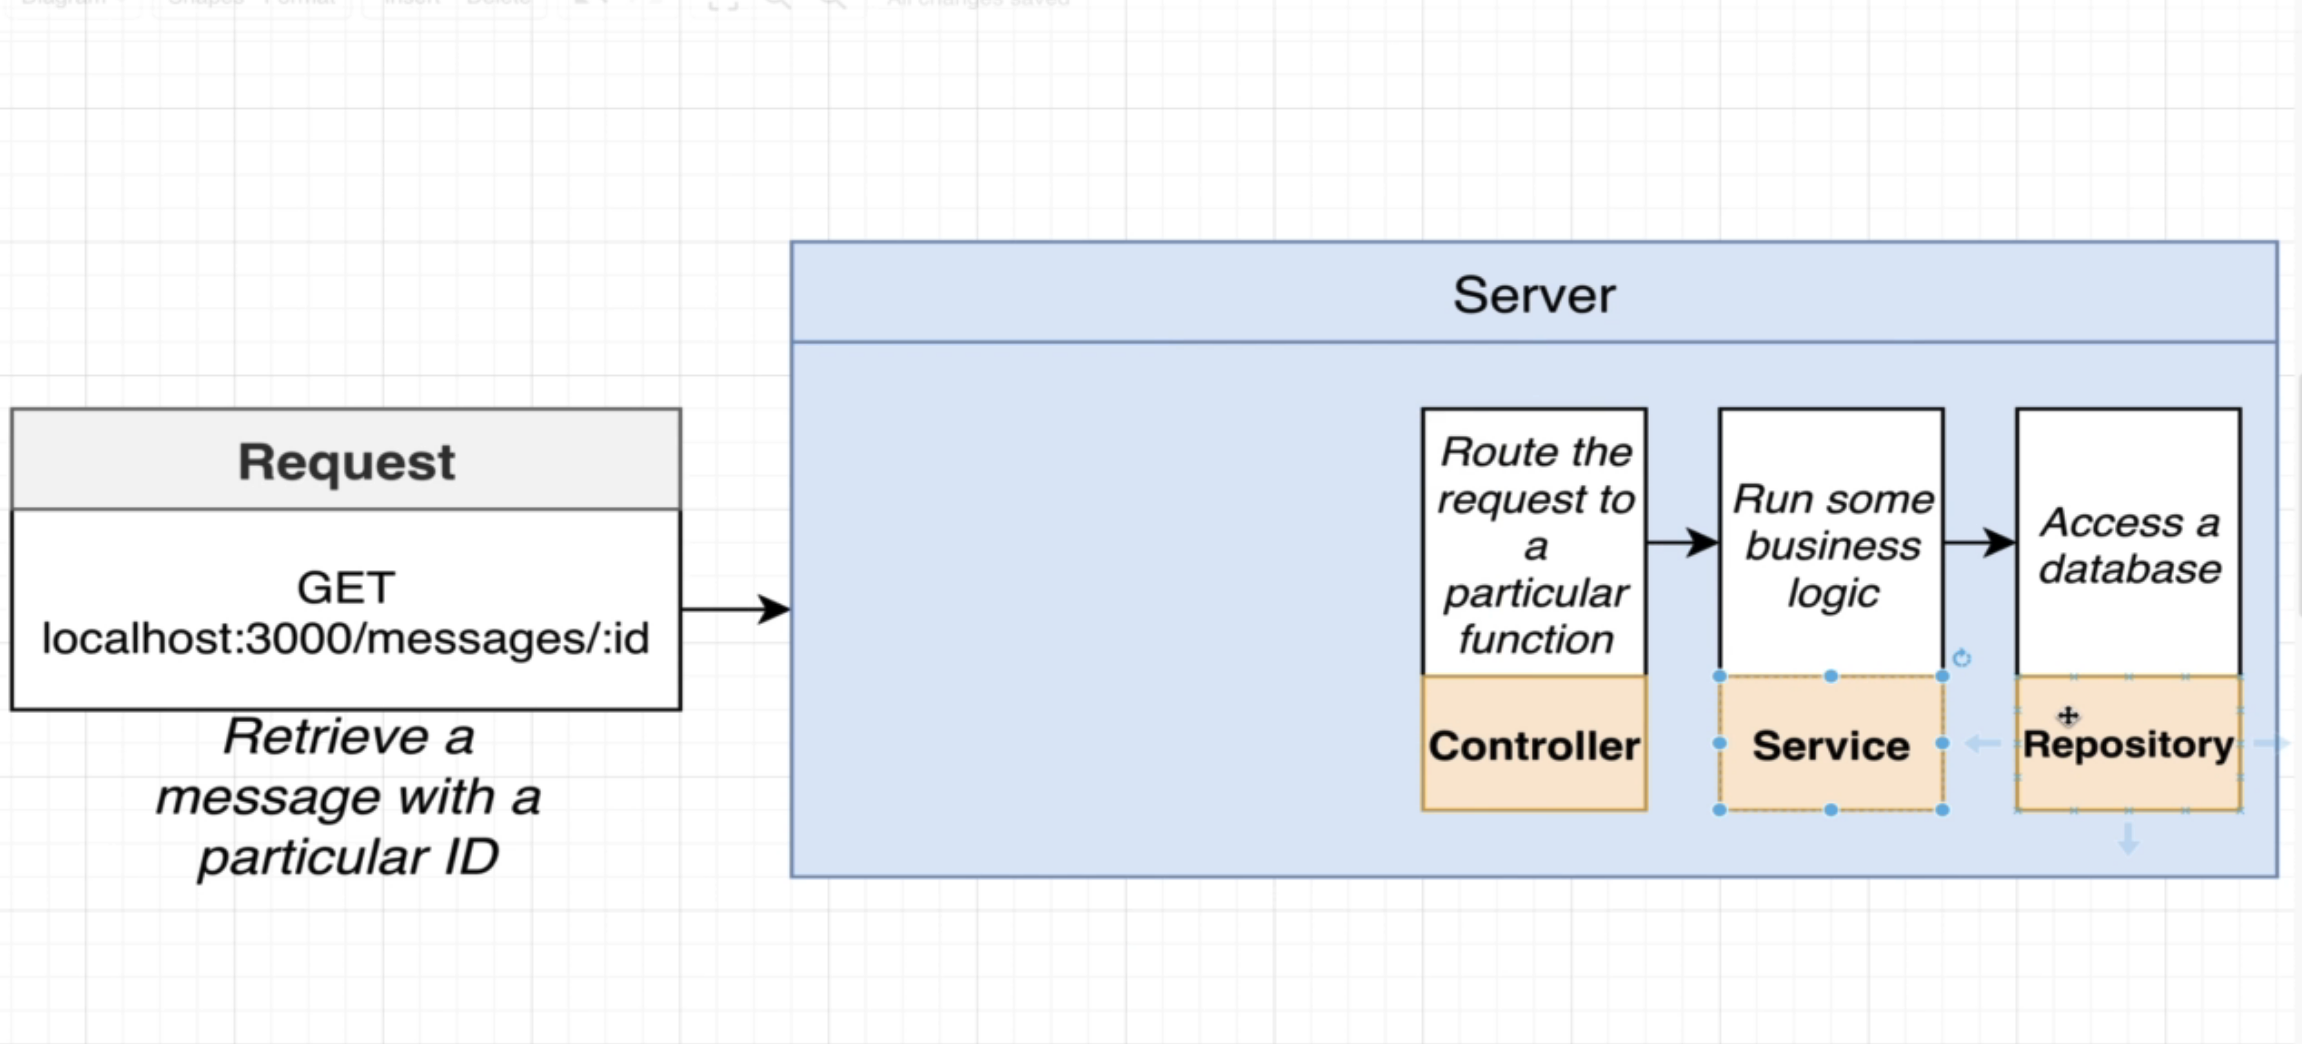
So, this above chunk is a visualization of what the finished product will look like.
To begin, it is useful to make use of Nest.js CLI to make creating things much faster.
nest generate module messages

nest generate controller  messages/messages --flat
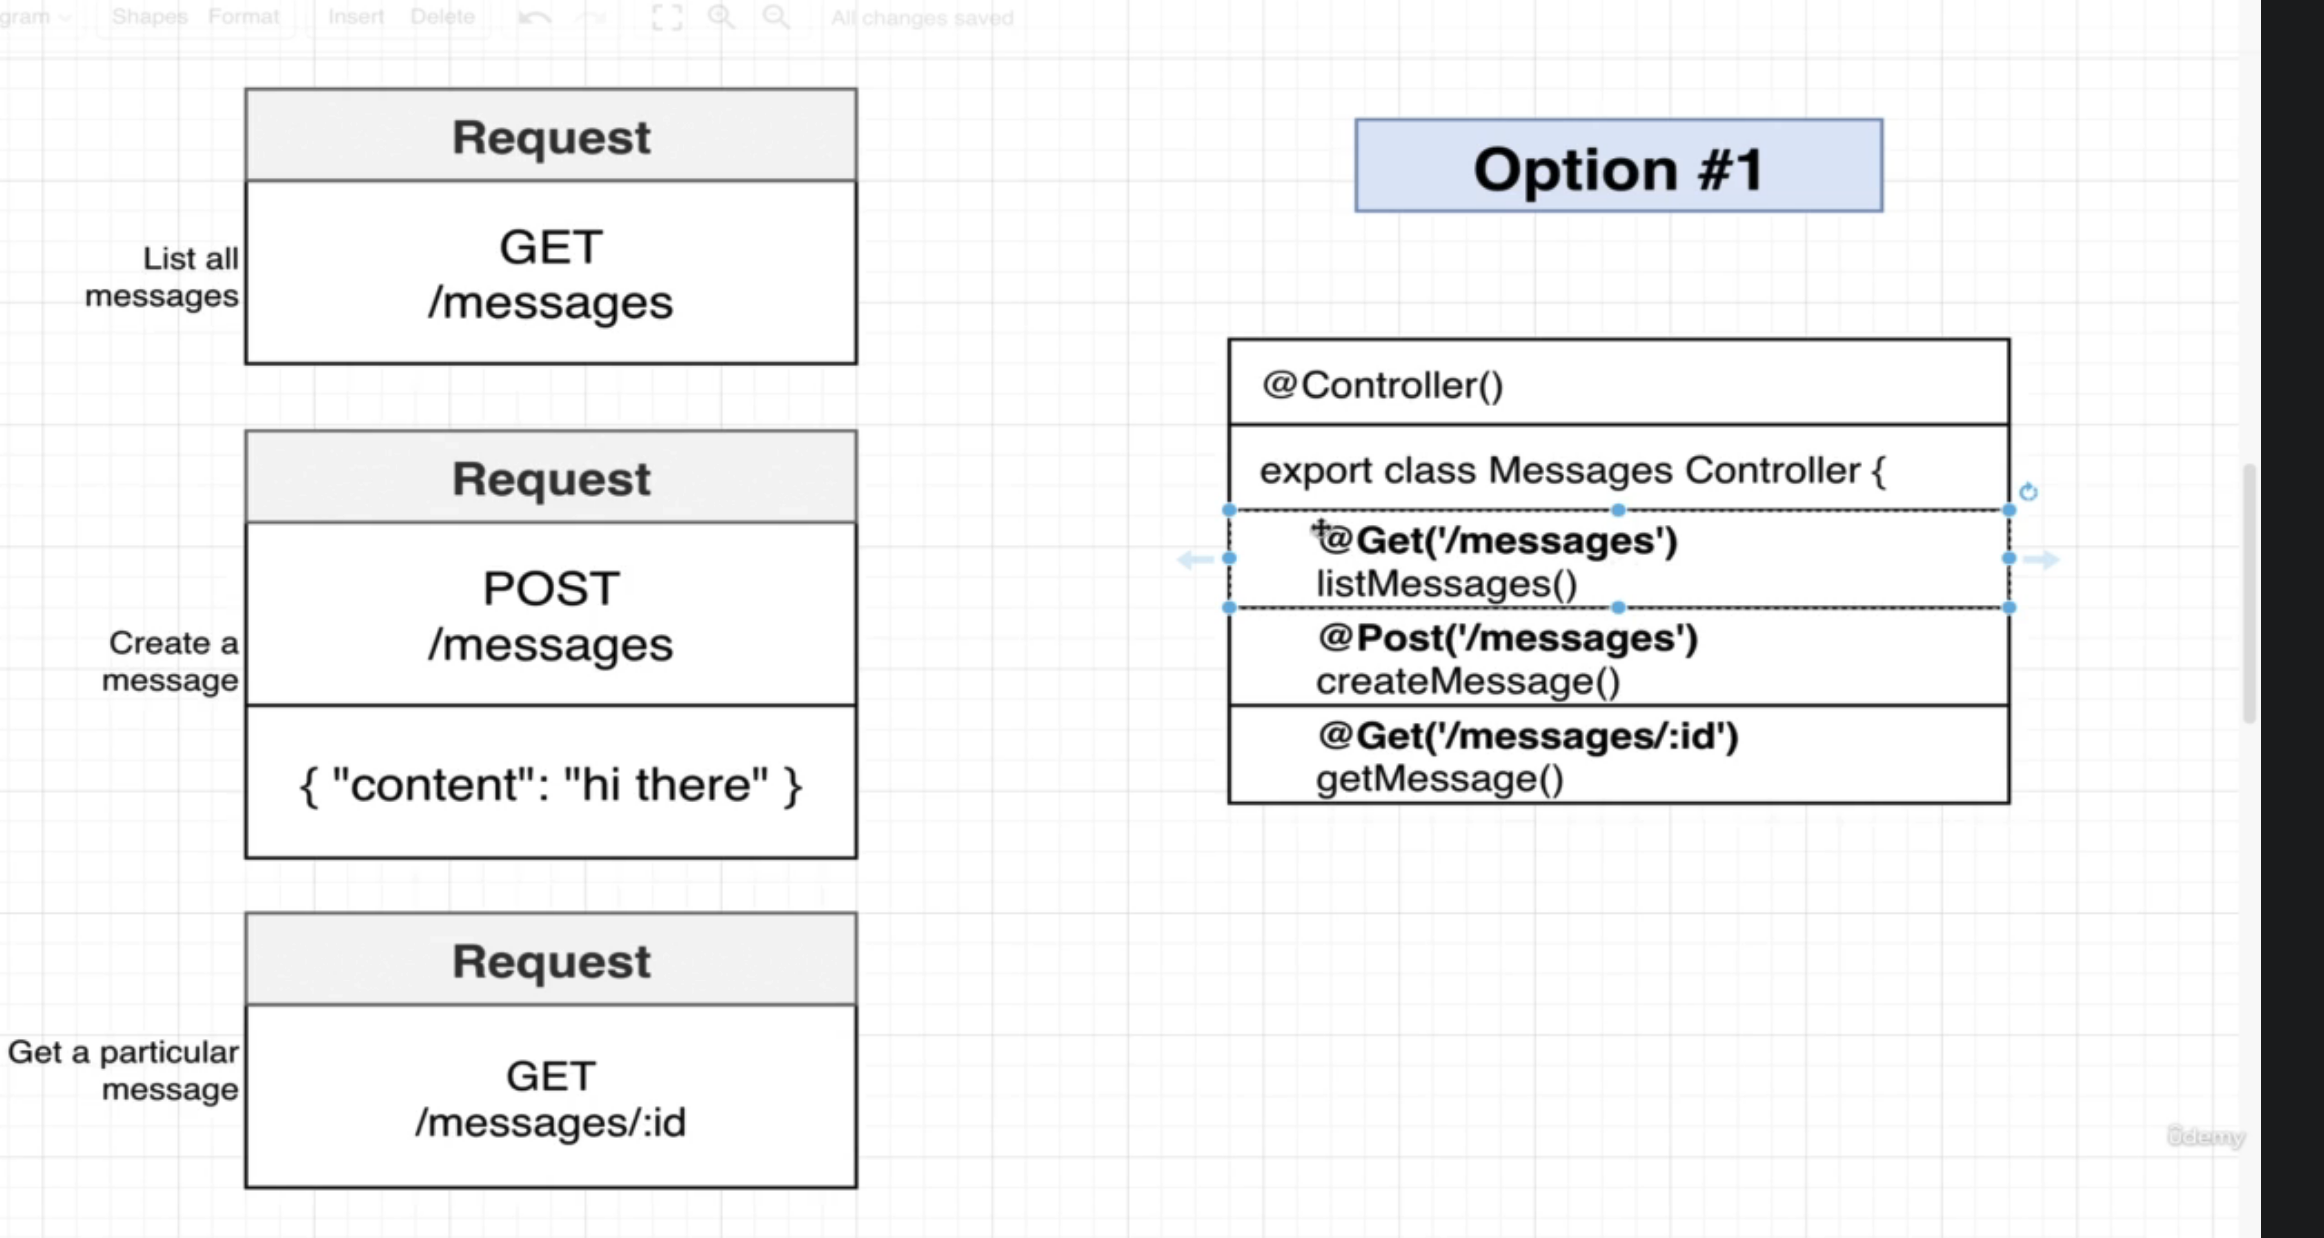
Once we have set up the request handlers, we can simply test using either POSTMAN, or a VSCode extension: REST client. Then, we make the file, something like, “requests.http”, and populate it with:
### THIS IS ALTERNATIVE TO POSTMAN, PERSONALLY I LIKE IT BETTER
### TESTING REQUEST HANDLERS

### List all messages
GET http://localhost:3000/messages


### Create a new message
POST http://localhost:3000/messages
content-type: application/json

{
    "content": "hi there"
}


### Get a particular message
GET http://localhost:3000/messages/328299581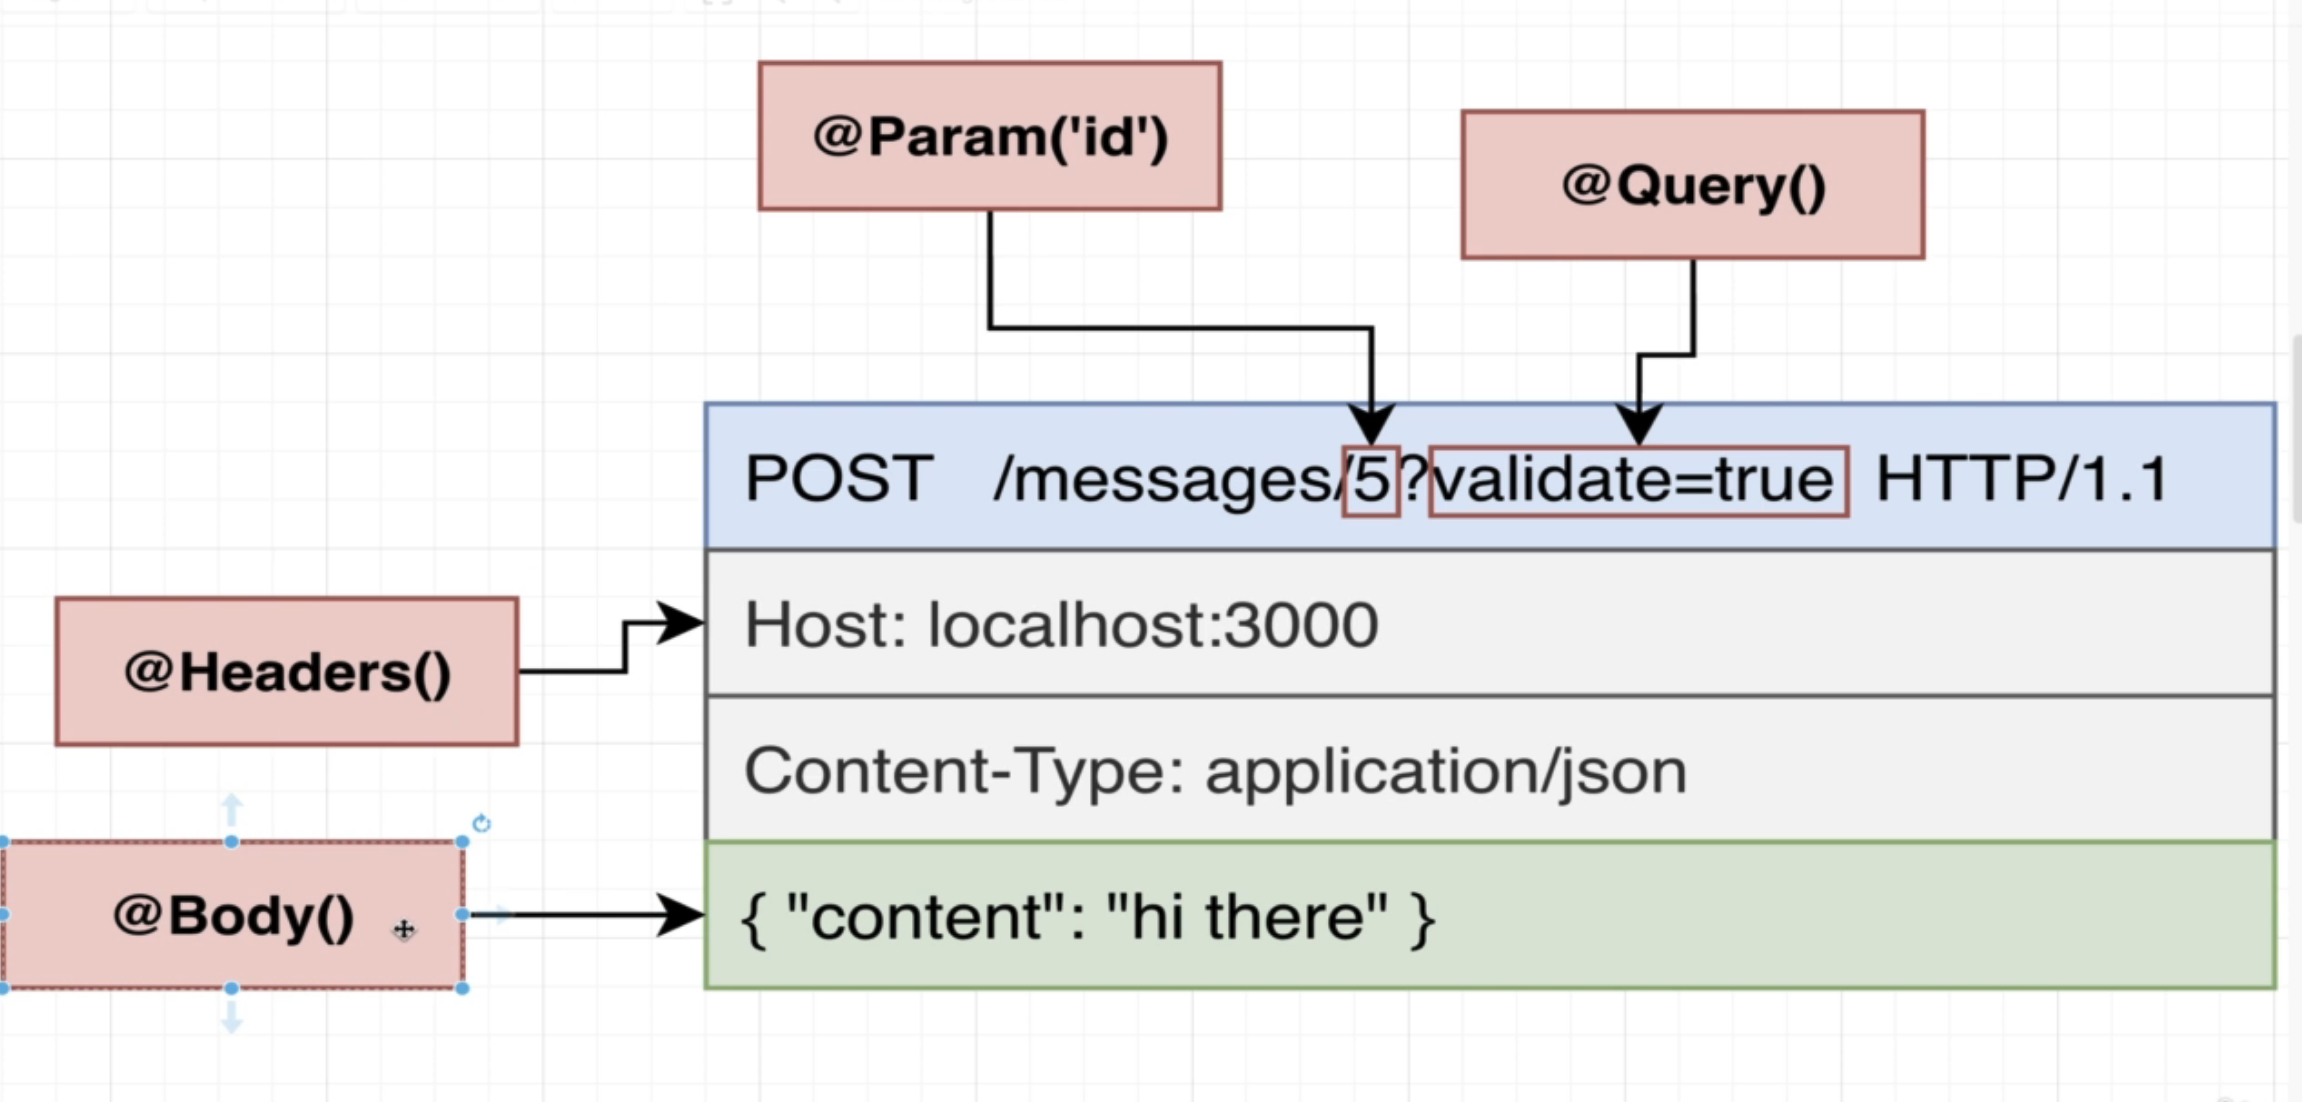
So, with these decorators, we can parse the URL to obtain what we want. This can be the query string, a specific parameter, or the body of the response, as shown above.
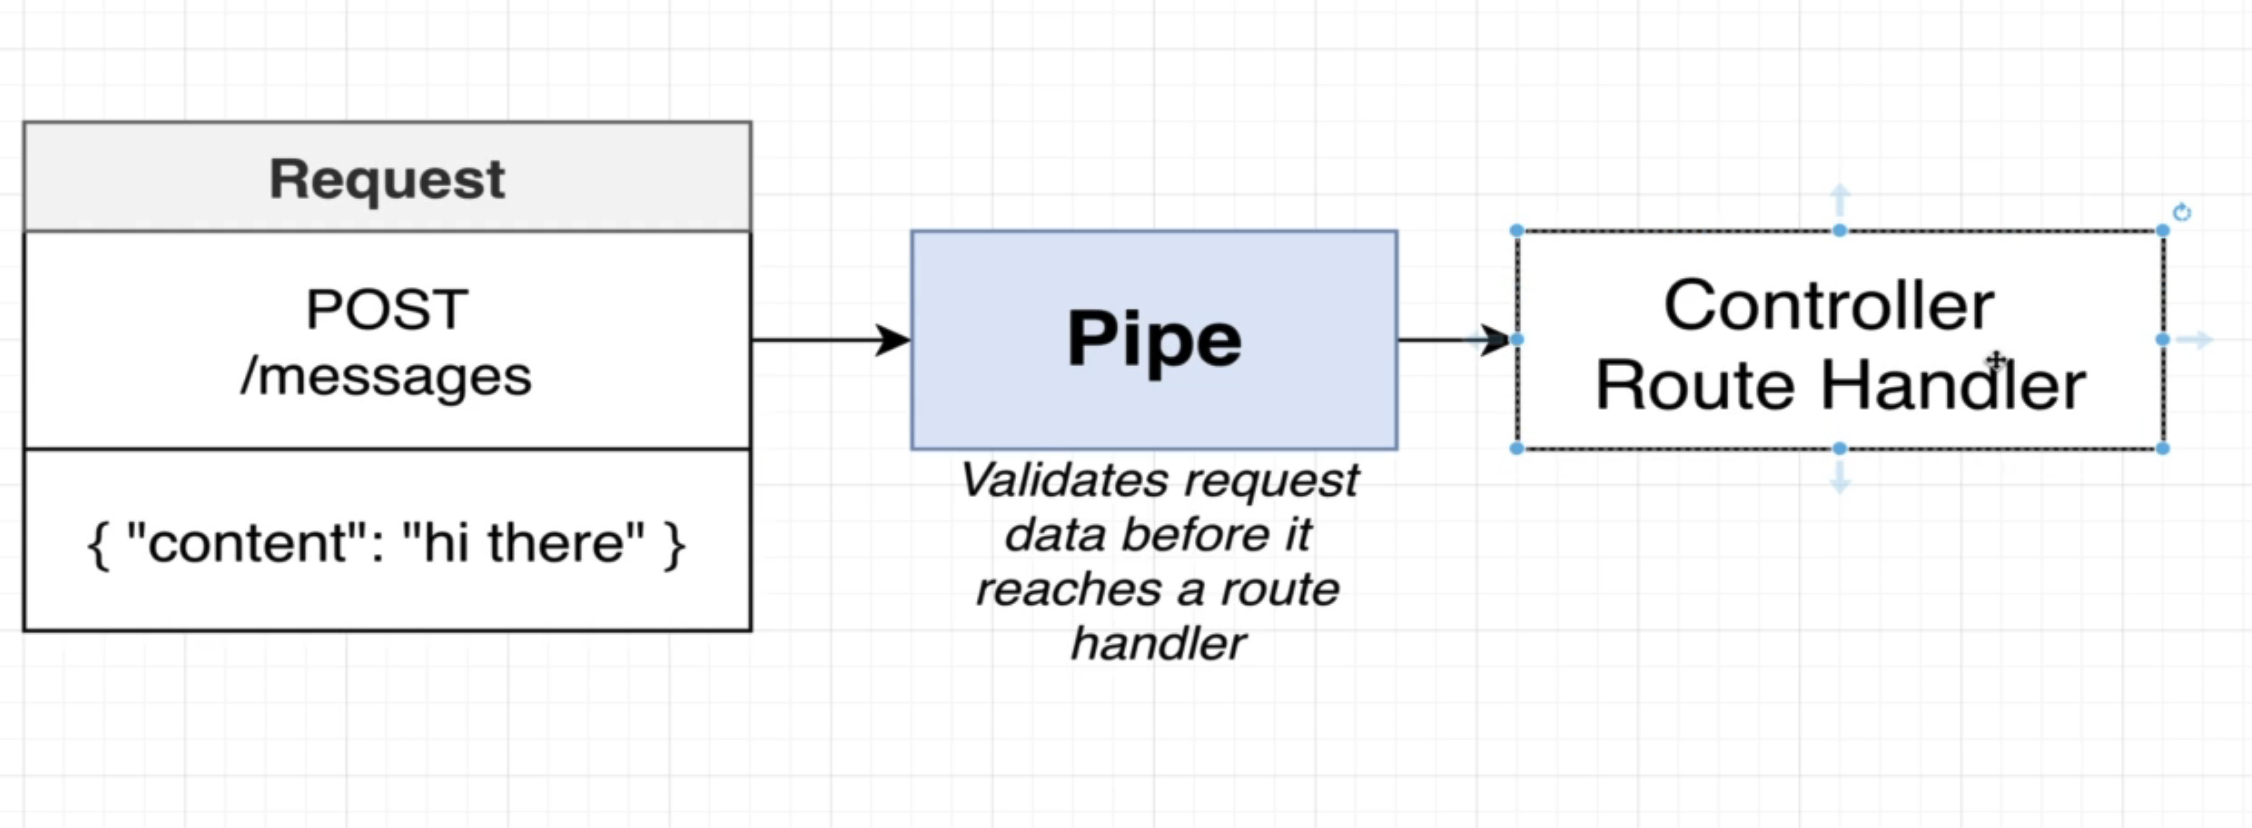
So, at this point, we have created a controller. Now, say we want to validate data that is being posted. We use a pip for this purpose.
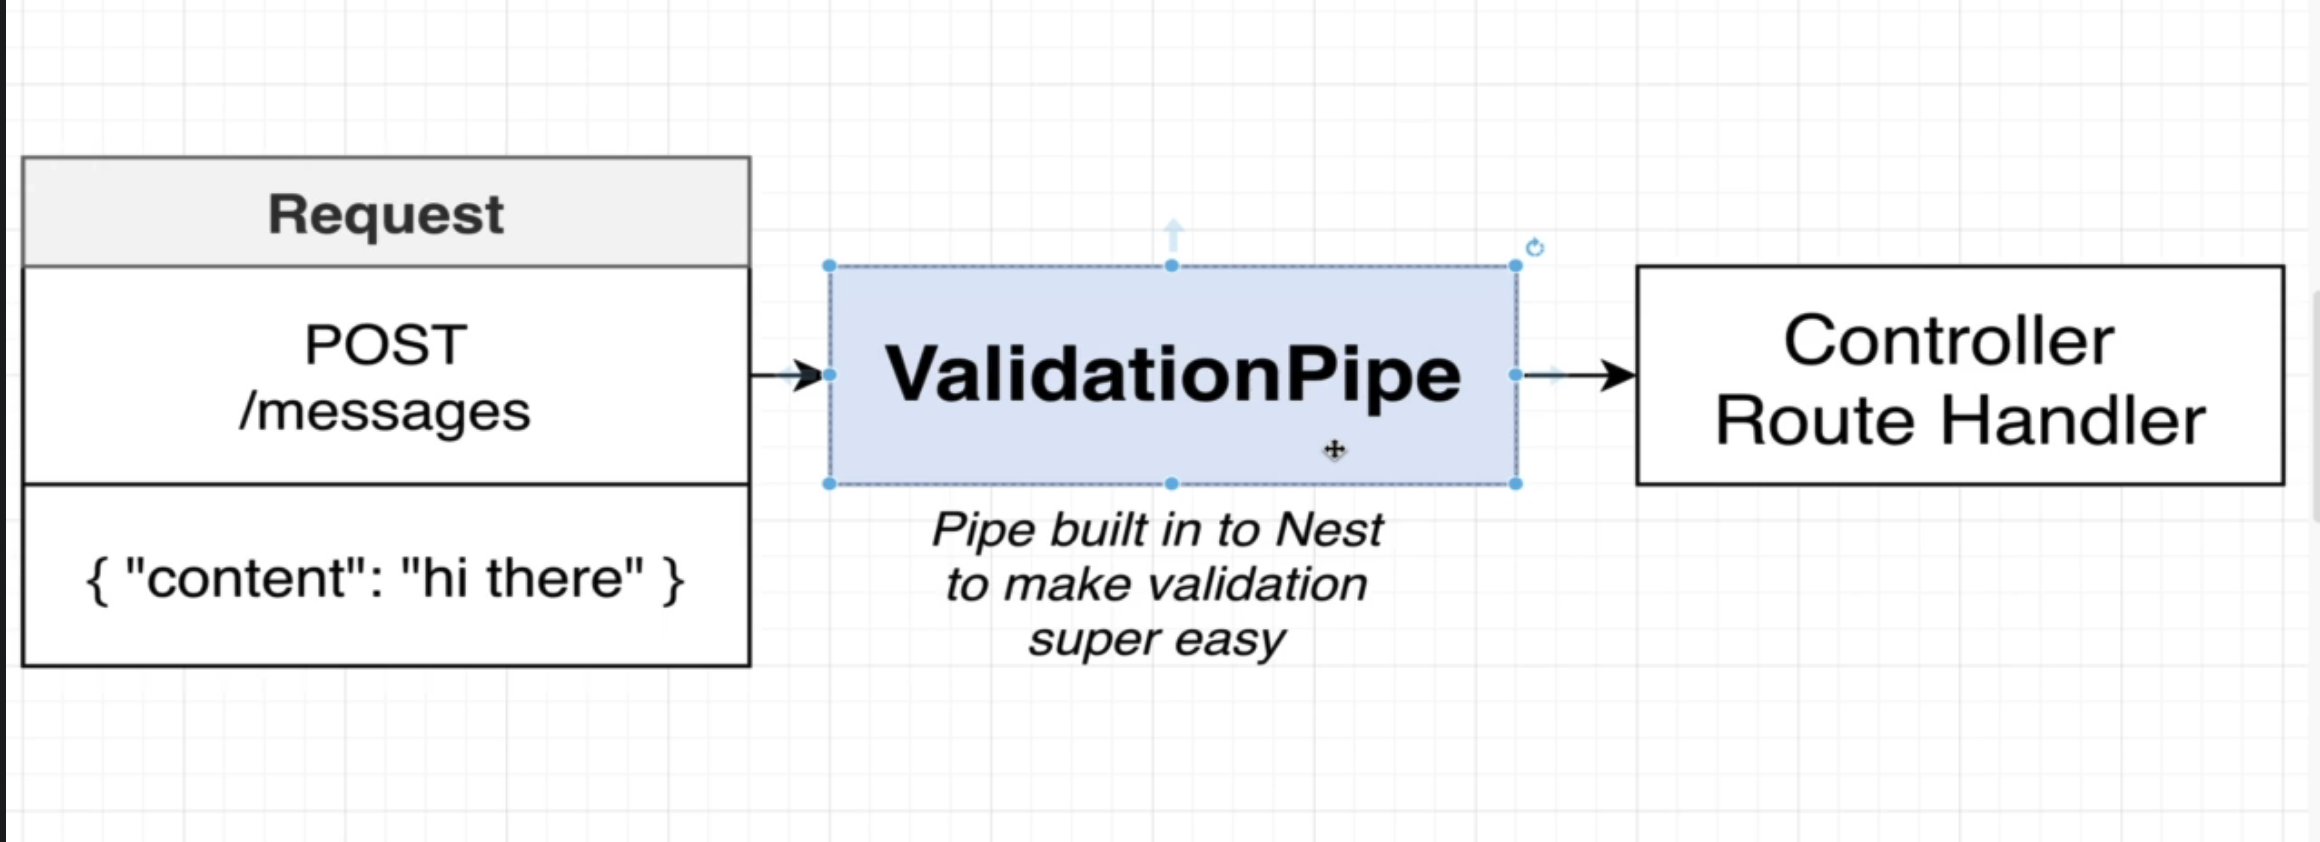
ValidationPipe is the built-in Nest pipe to validate things. To create a validation pipe, we simply:
import { NestFactory } from '@nestjs/core';
import { ValidationPipe } from '@nestjs/common';
import { MessagesModule } from './messages/messages.module';

async function bootstrap() {
  const app = await NestFactory.create(MessagesModule);
  app.useGlobalPipes(new ValidationPipe());
  await app.listen(3000);
}
bootstrap();
Now, we need to create a special set of rules for the validation pipe to follow.
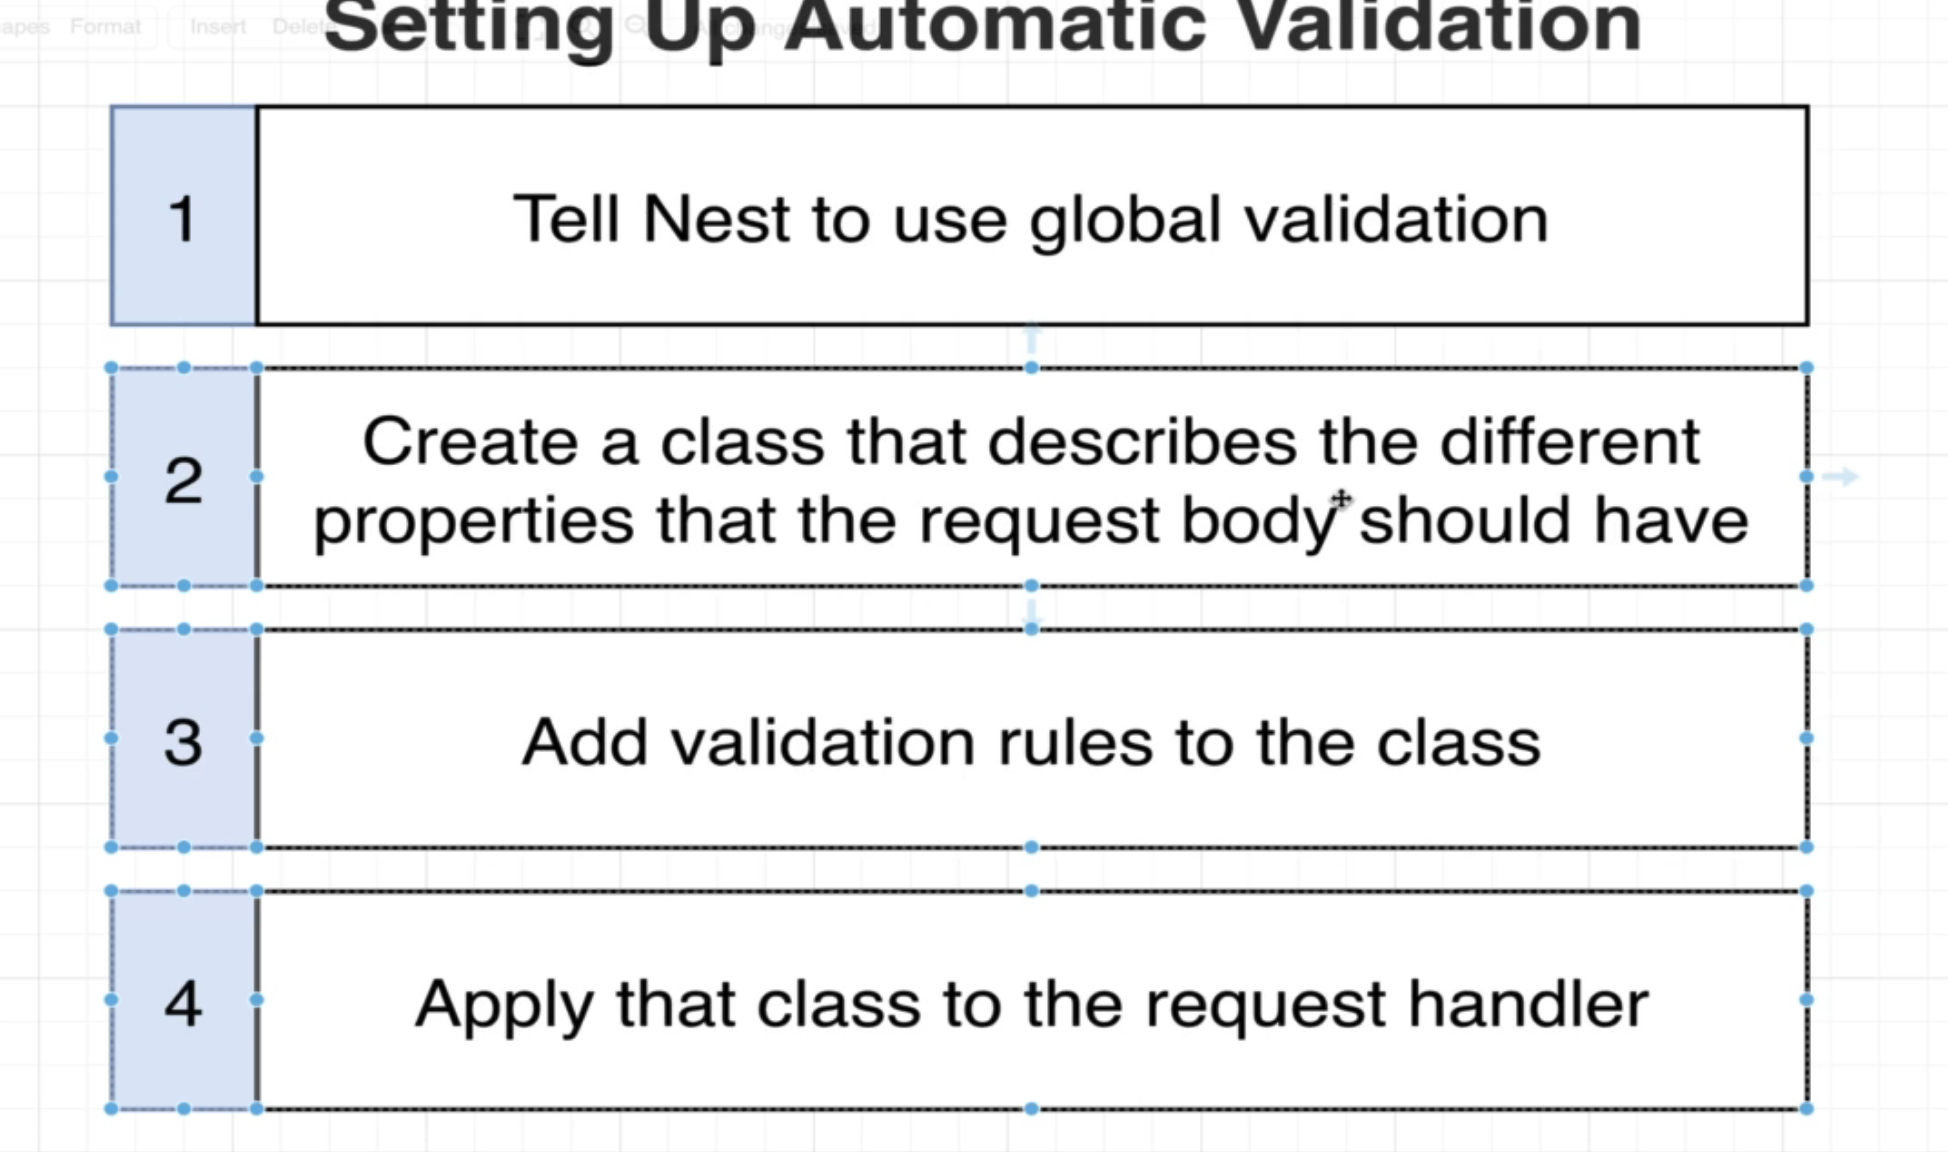
We need only to to step 1, once, which is the code above. For every thing we want to validate, we will need to repeat steps 2,3,4.
In particular, for step 2, the class we make is called a Data Transfer Object (dto). This is what you’ve been seeing in the company back-end API repo. So, here is to code to make sure that the content of a POST request is a string:
// in create-message.dto.ts
import { IsString } from 'class-validator';

export class createMessageDto {
    @IsString() // this is a validator. We can now ensure that whenever we make an instance of createMessageDto, that the content is a string
    content: string;
}

// in messages.controller.ts
@Post()
    createMessage(@Body() body: createMessageDto) { // here, Nest extracts the body for us, and supplies it as a parameter for us
        console.log(body);
    }

// note how now, we extract the body and say it is of type createMessageDto,
// my guess is it takes the string and implicitly calls the constructor of
// createMessageDto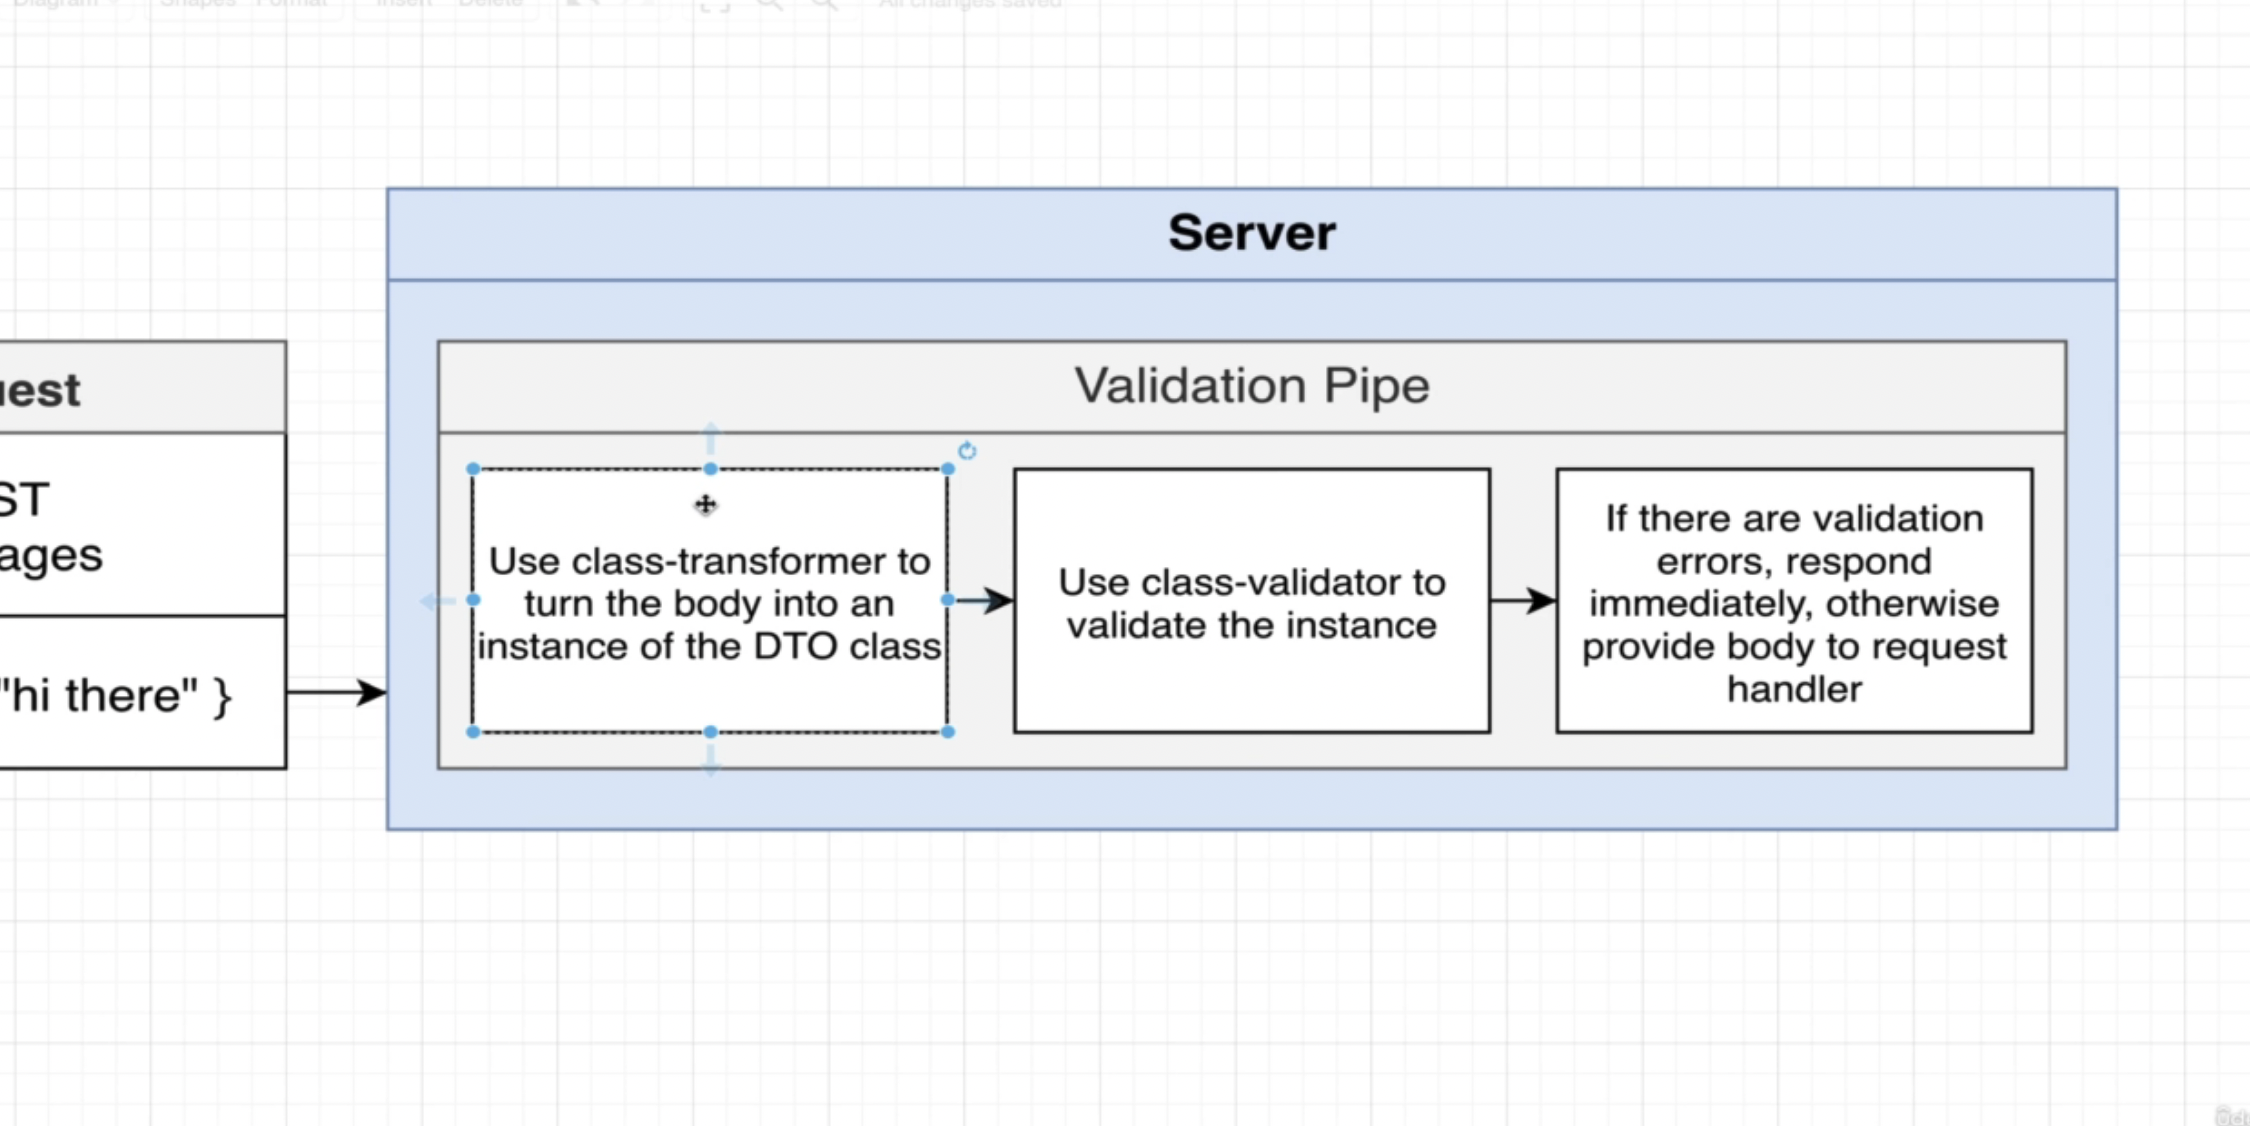
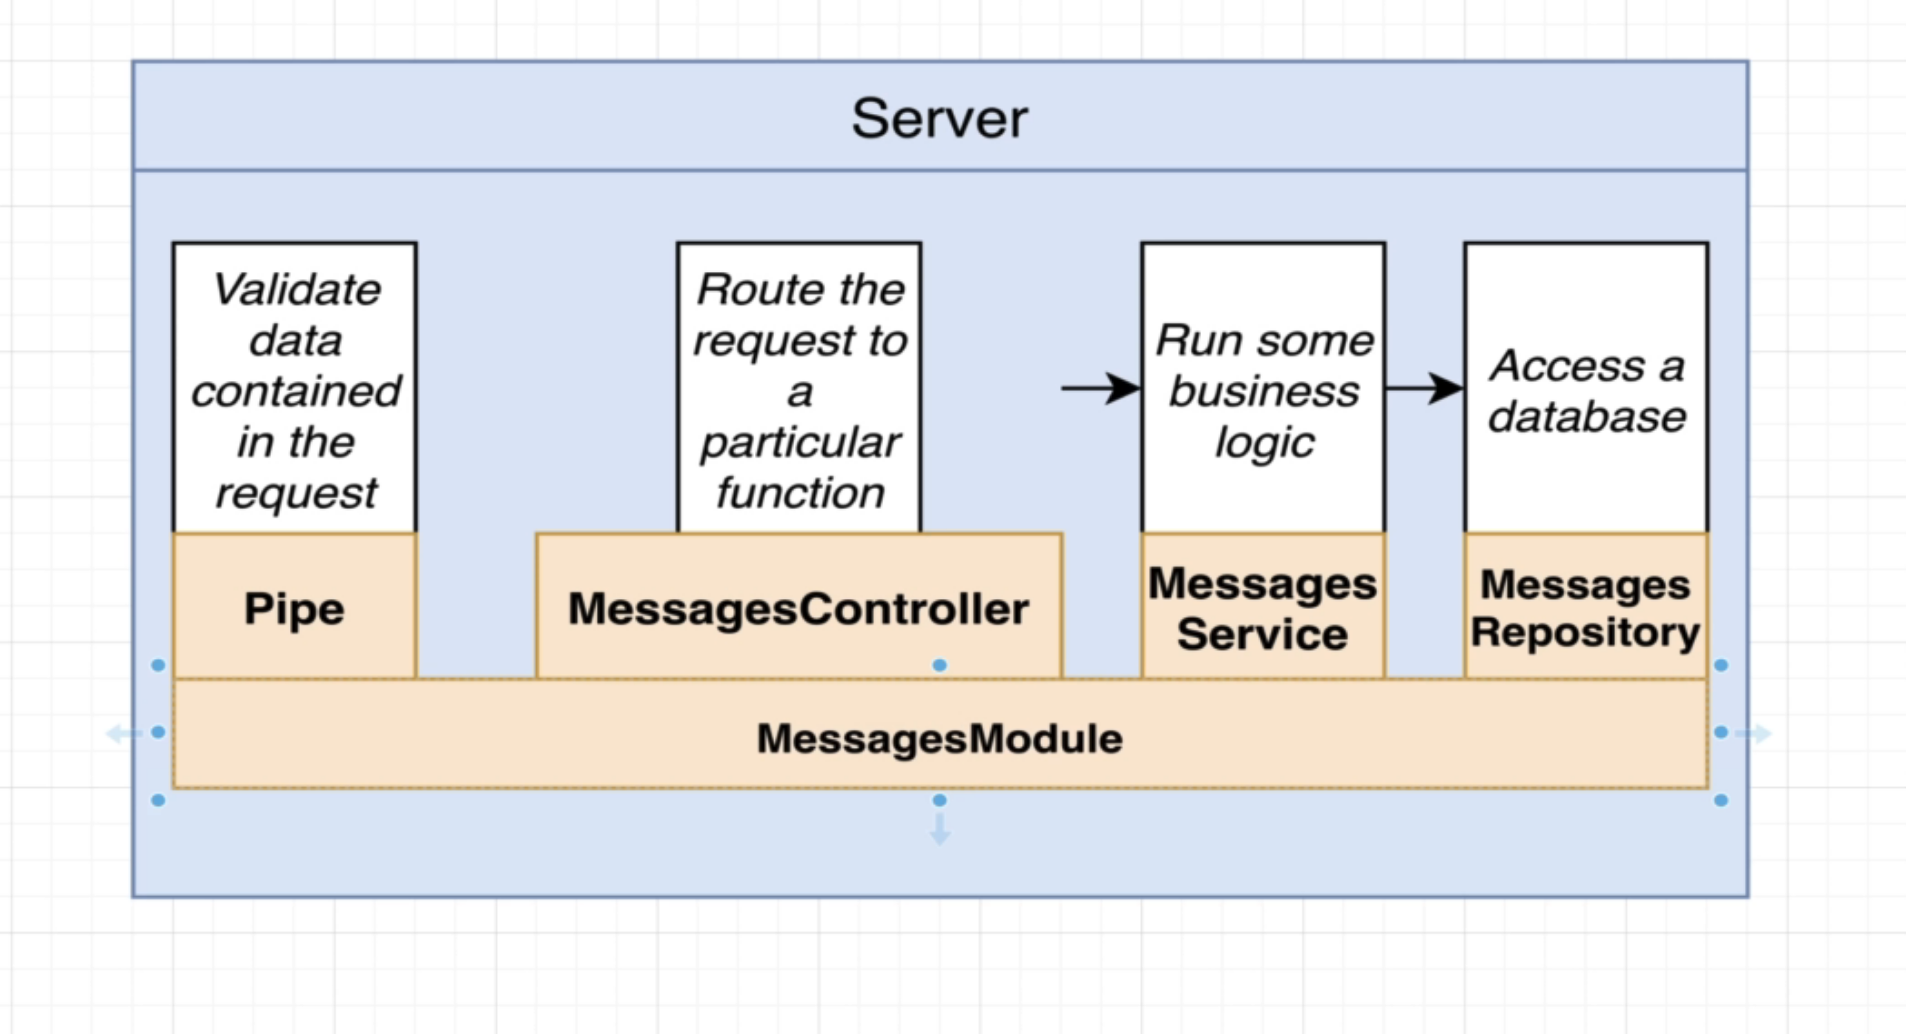
The diagram above illustrates what is happening here. Recall that we needed to npm install class-transformer class-validator. These are what power this process. First, the JSON is converted into an instance of the DTO class (in our case, the CreateMessageDto). Then, after we have a DTO object, the decorators run to run validation with class-validator. Lastly, it checks if there are errors.
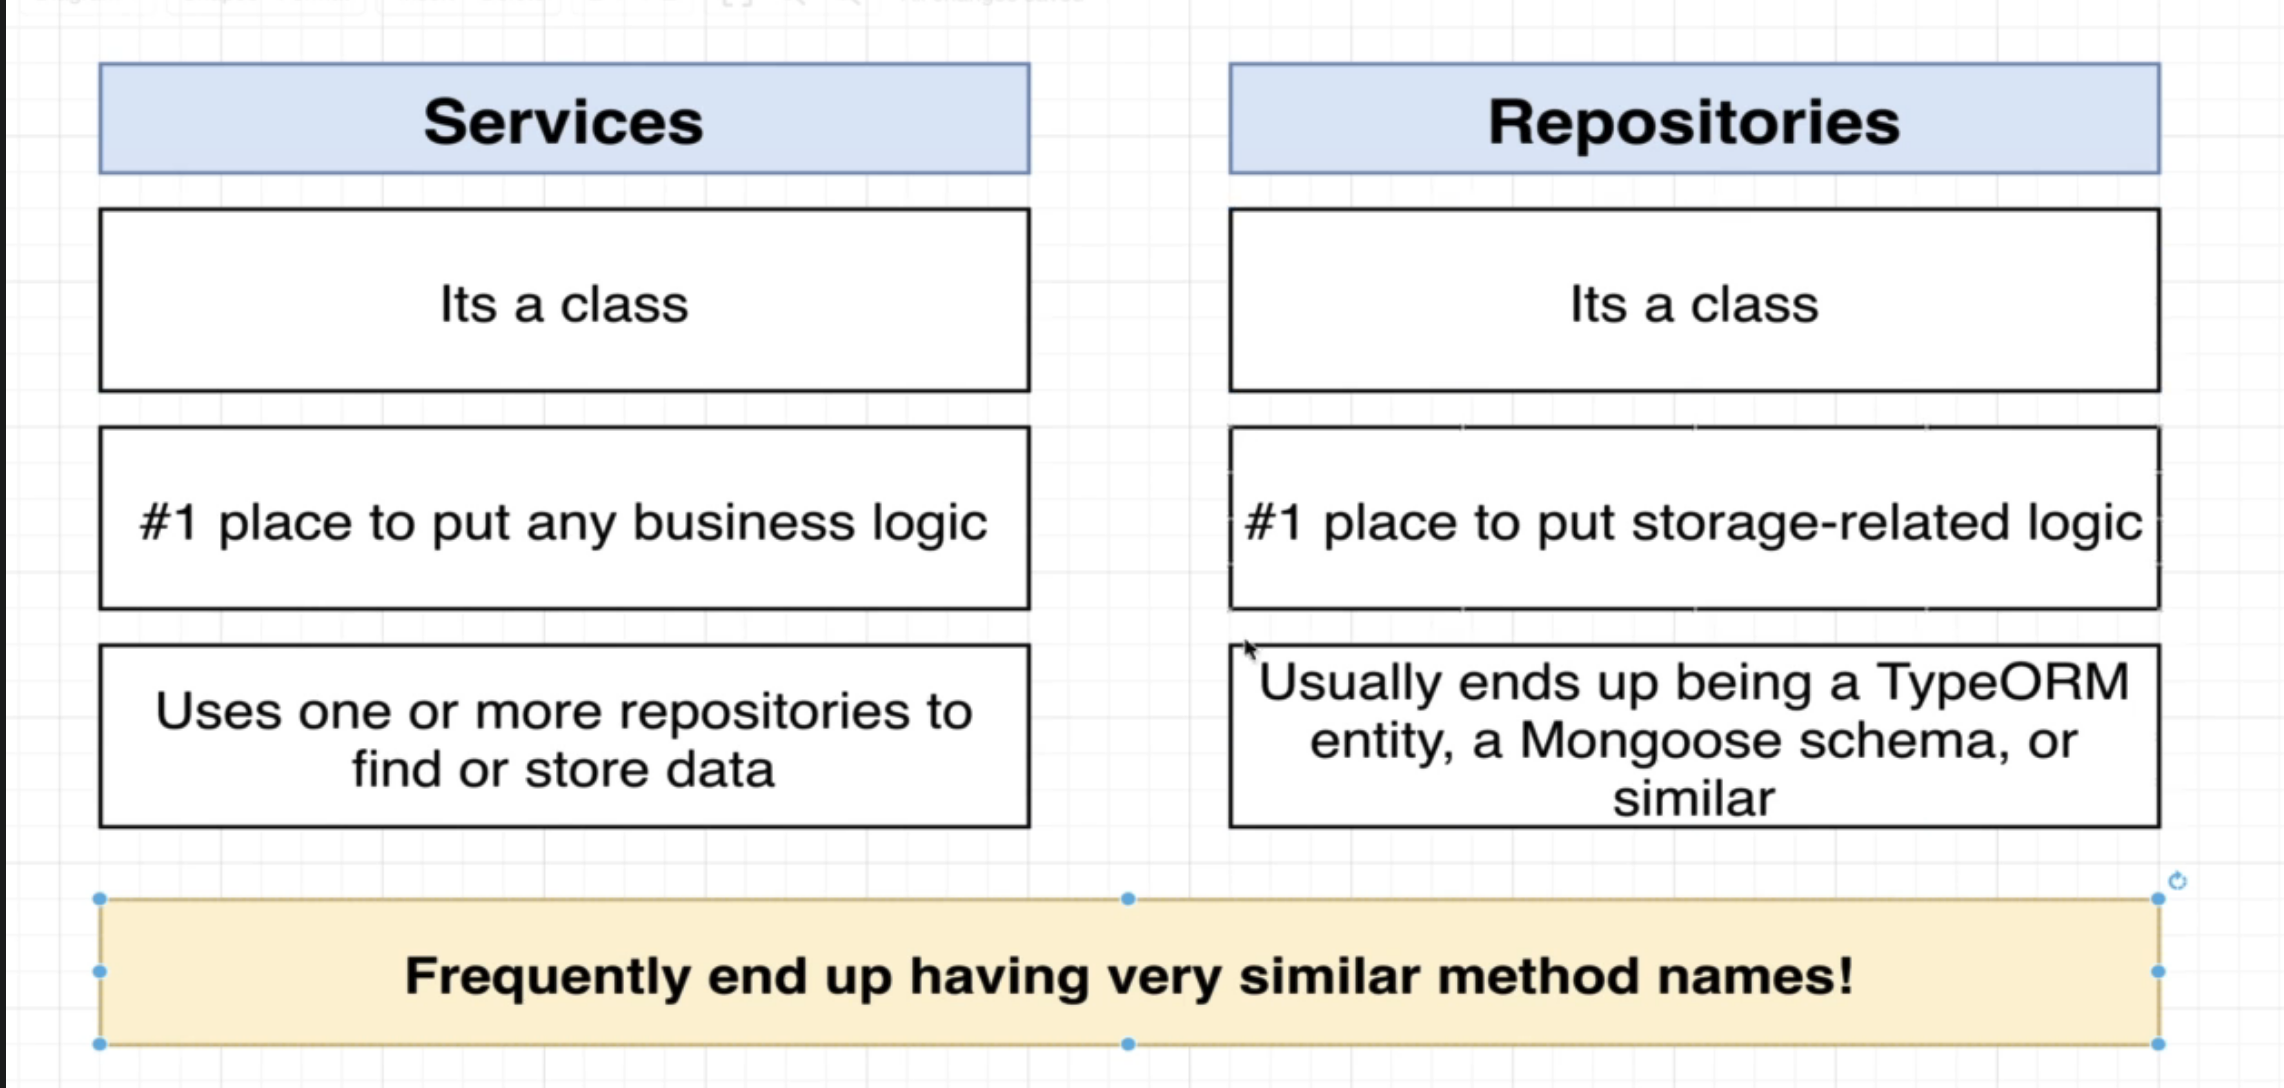
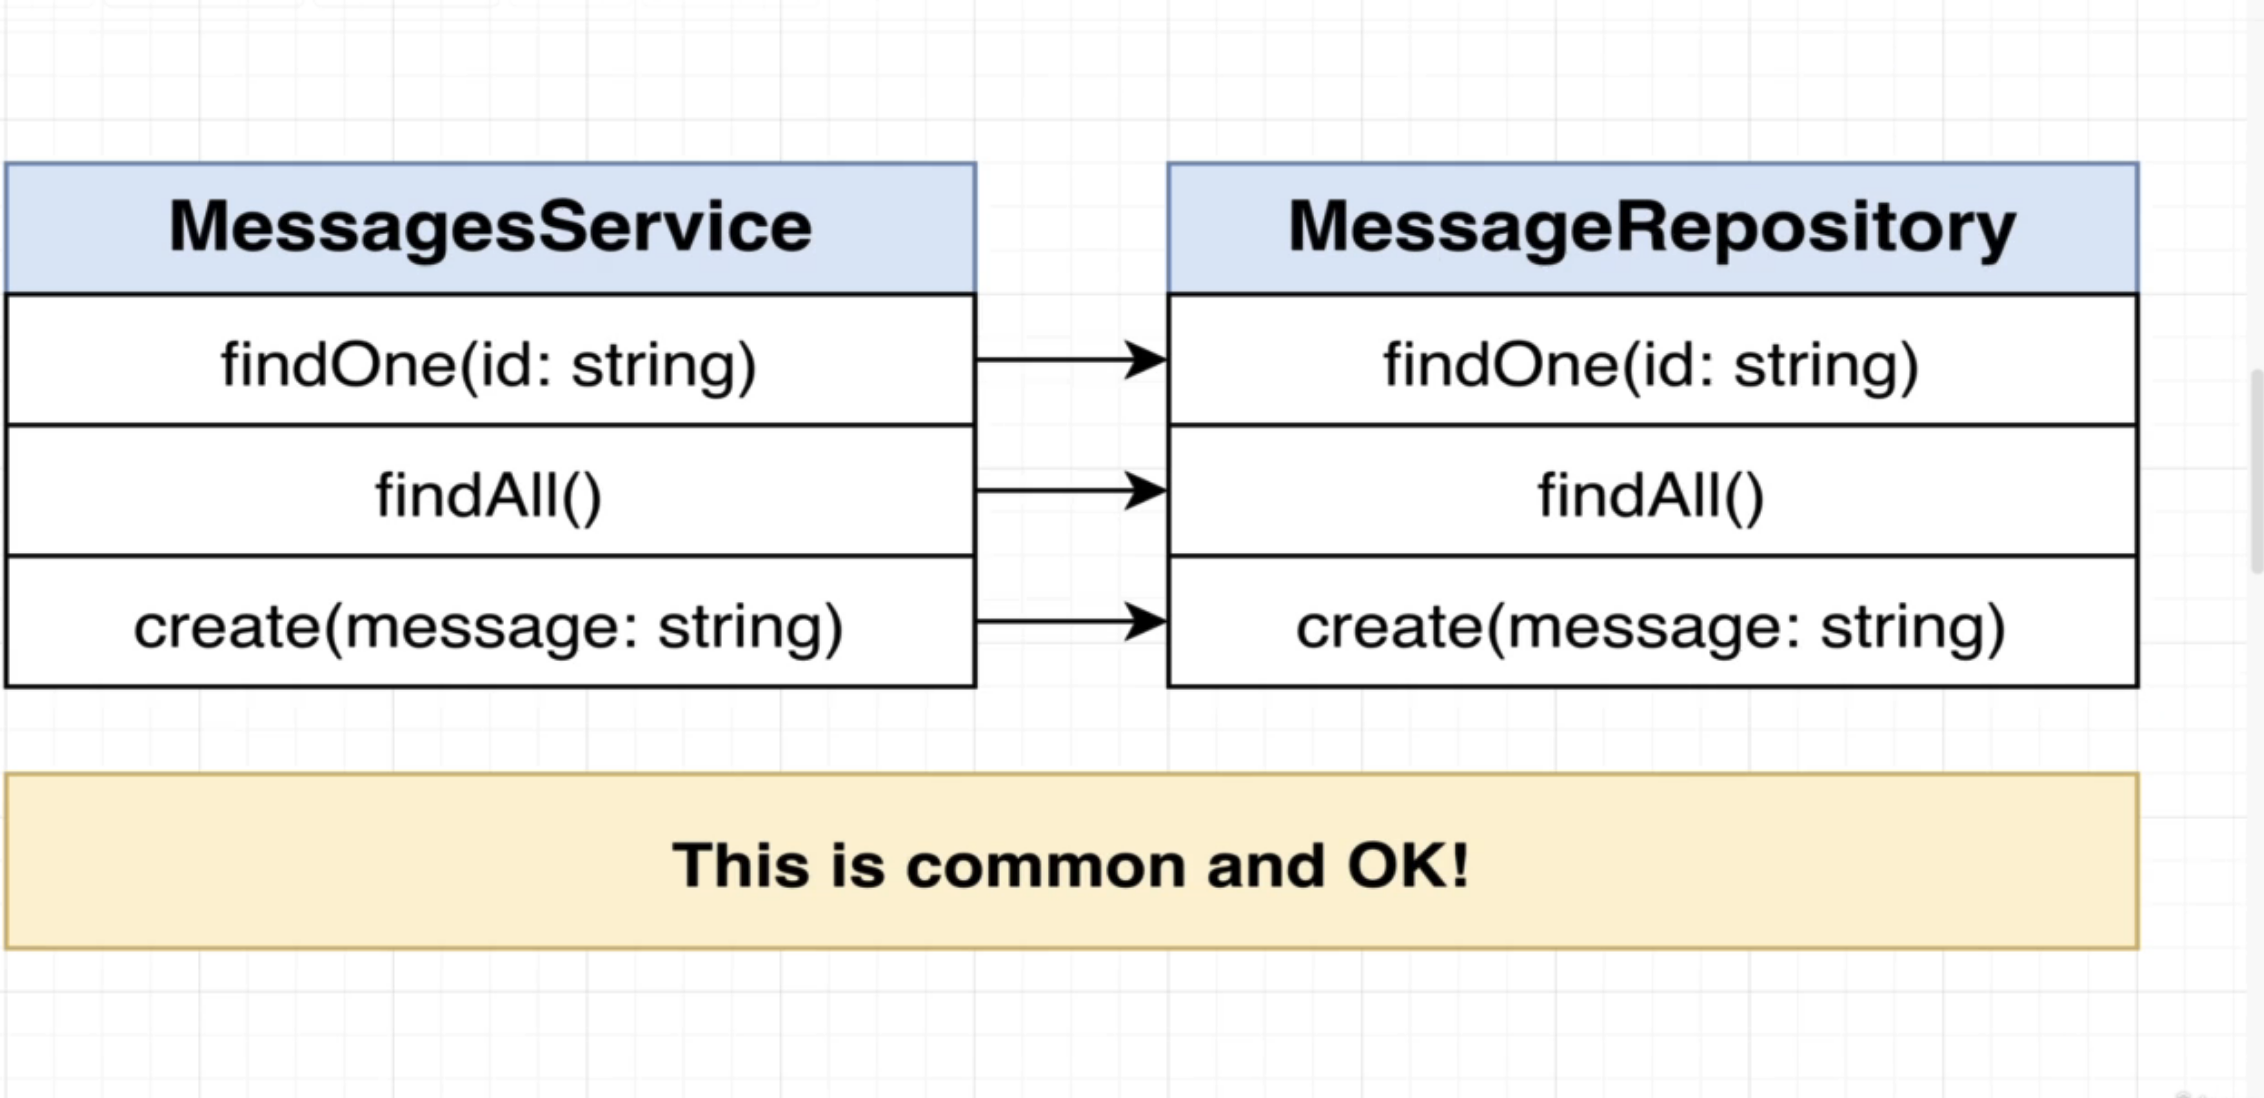
So, let’s see how to implement the repository and the service. Code is simple, can be found in the messages folder.
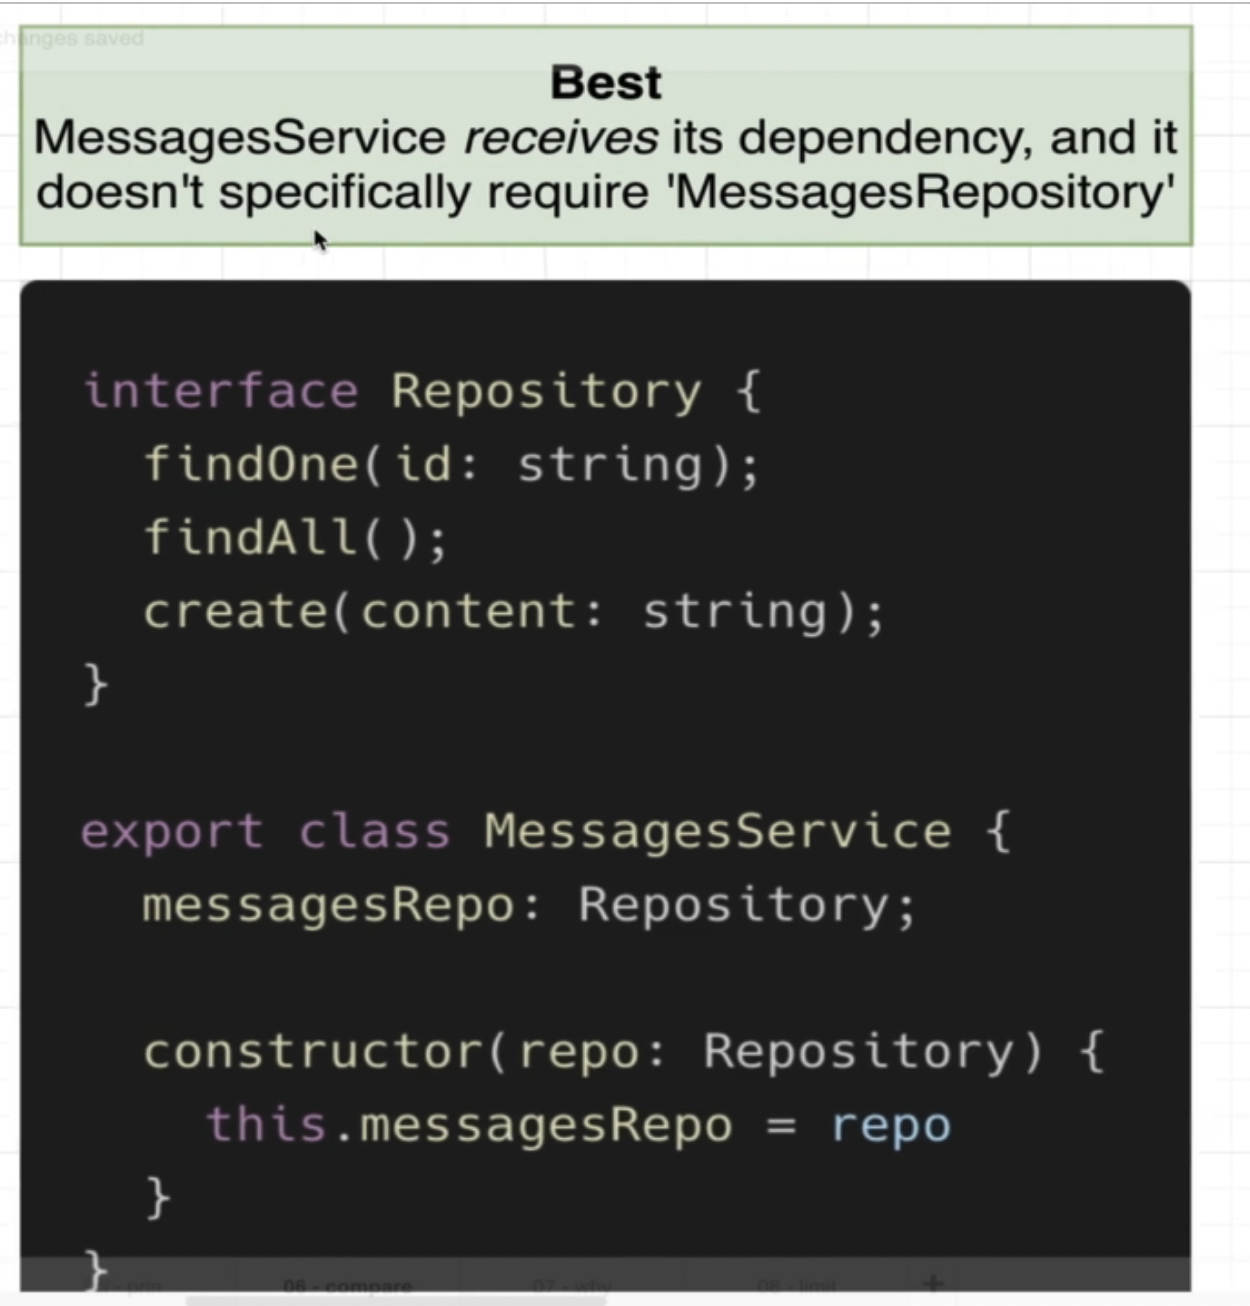
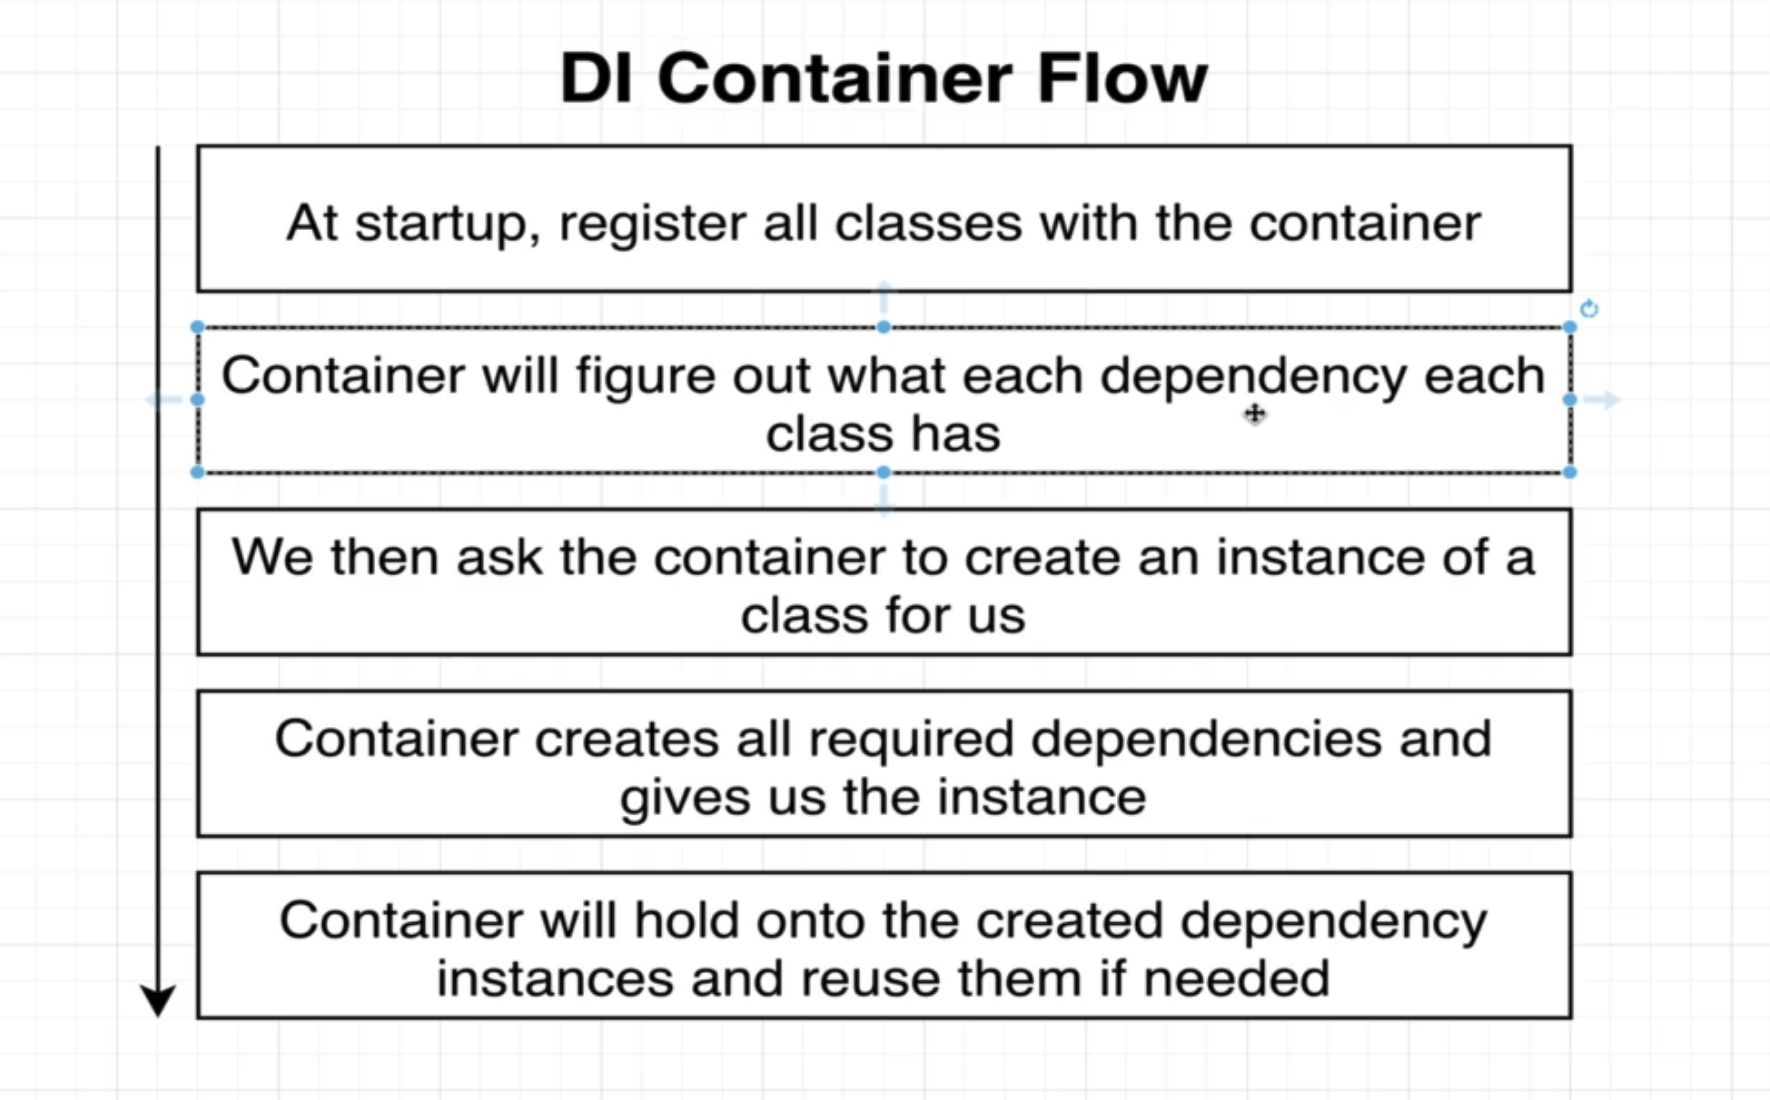
Now, one of the most important concepts about Nest.js is dependency injection. While it is very easy to briefly go over the syntax and how to use it, it is imperative we understand what it is trying to accomplish.
To begin, we go over some important concepts.
Inversion of Control Principle
This principle states: Classes should not create instances of its dependencies on its own. Earlier, we said that this:
constructor() {
        // we have now setup a dependency between the two classes , WE DON'T ACTUALLY DO THIS.
        // There is something called dependency injection, so the line below will soon be obsolete
        this.messagesRepo = new MessagesRepository();
    }
was a terrible. Instead, what is the best way of doing this is:
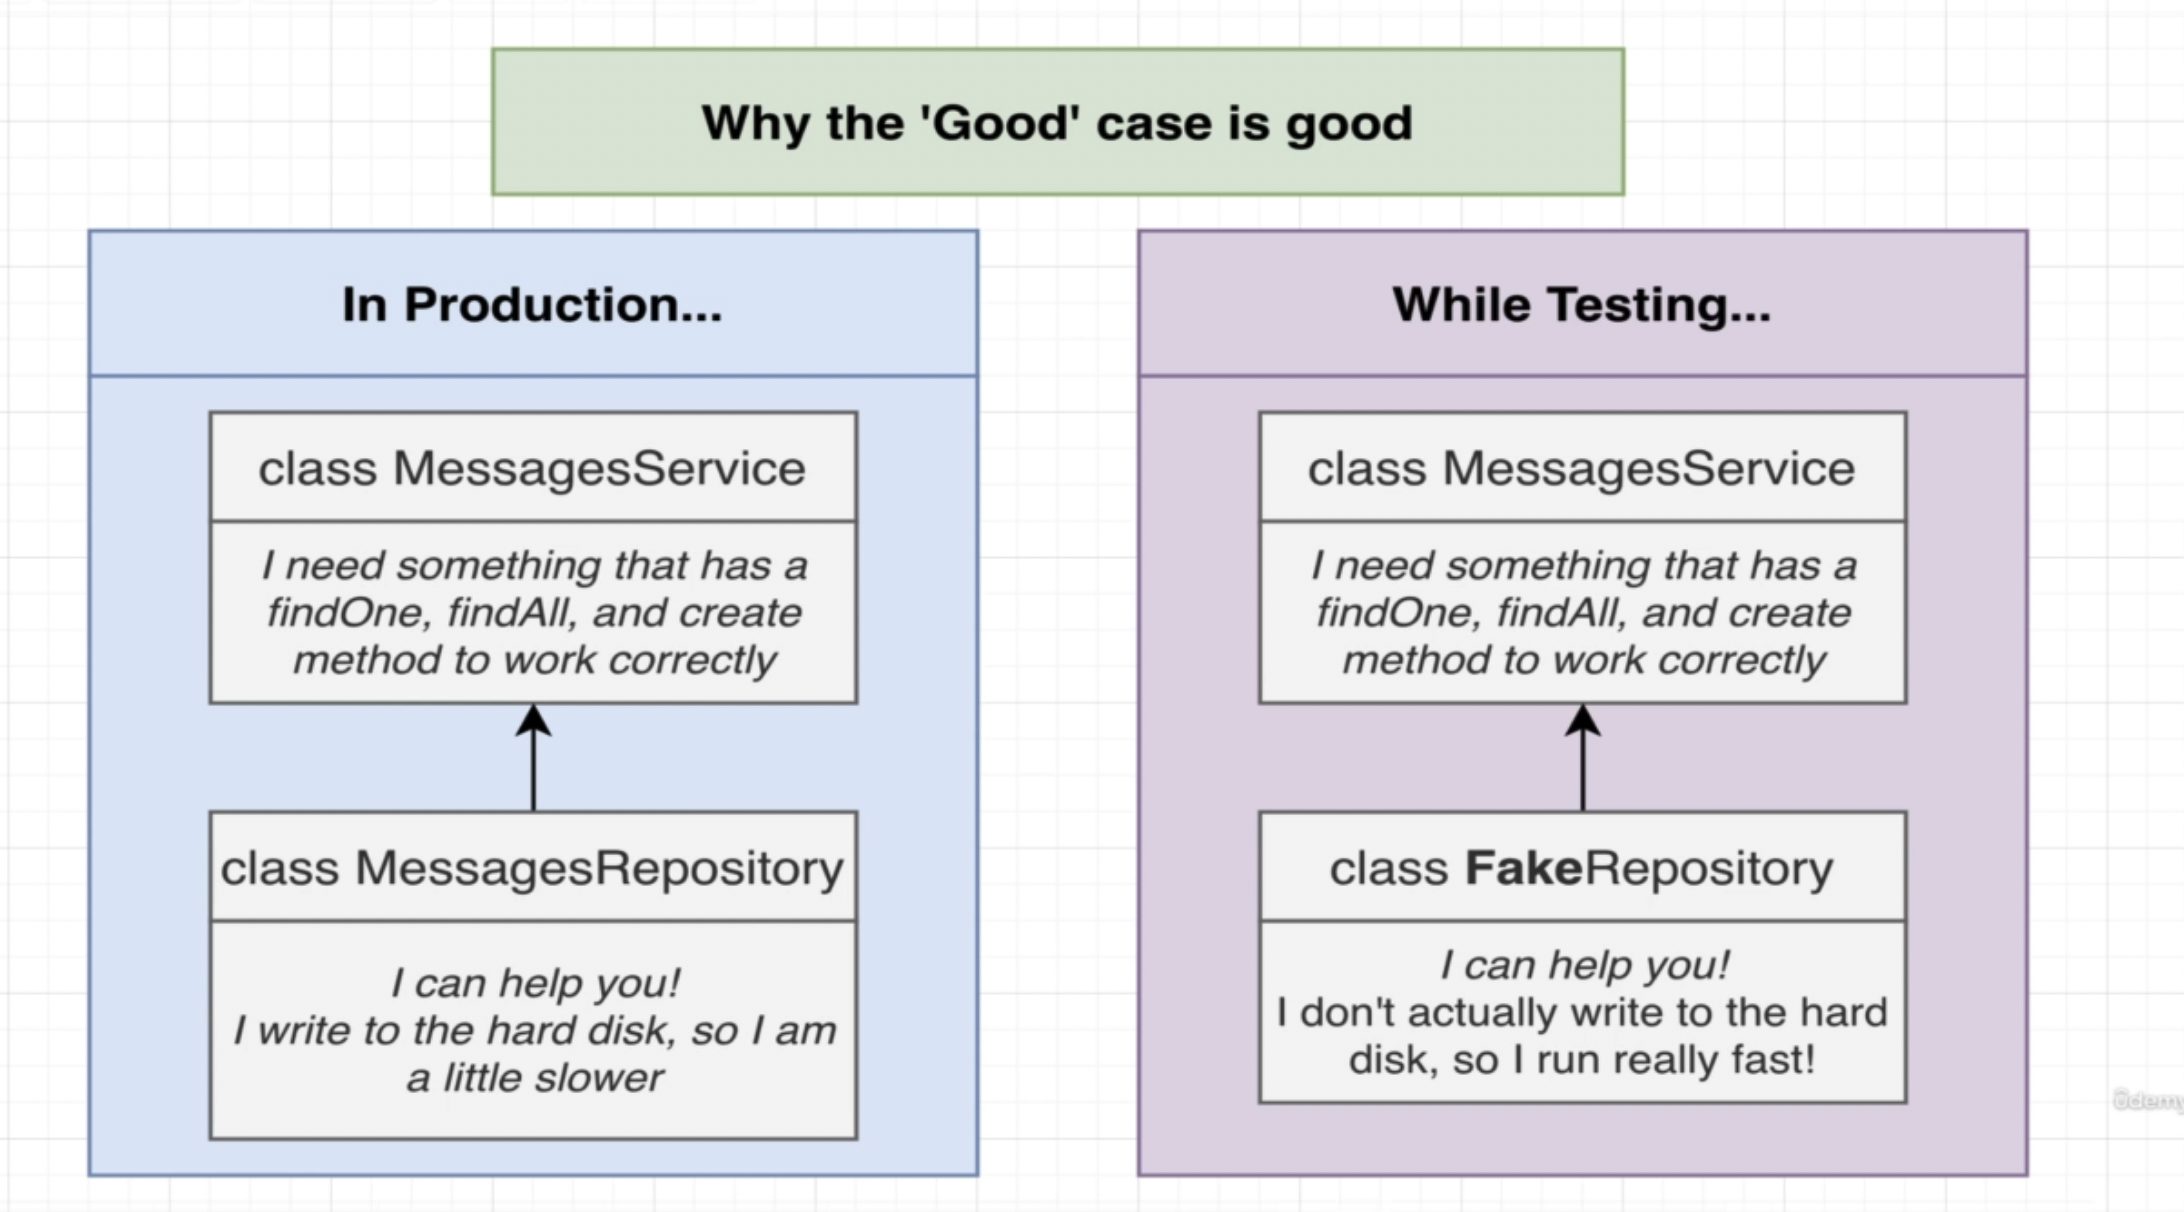
However, this principle also comes with its downsides.
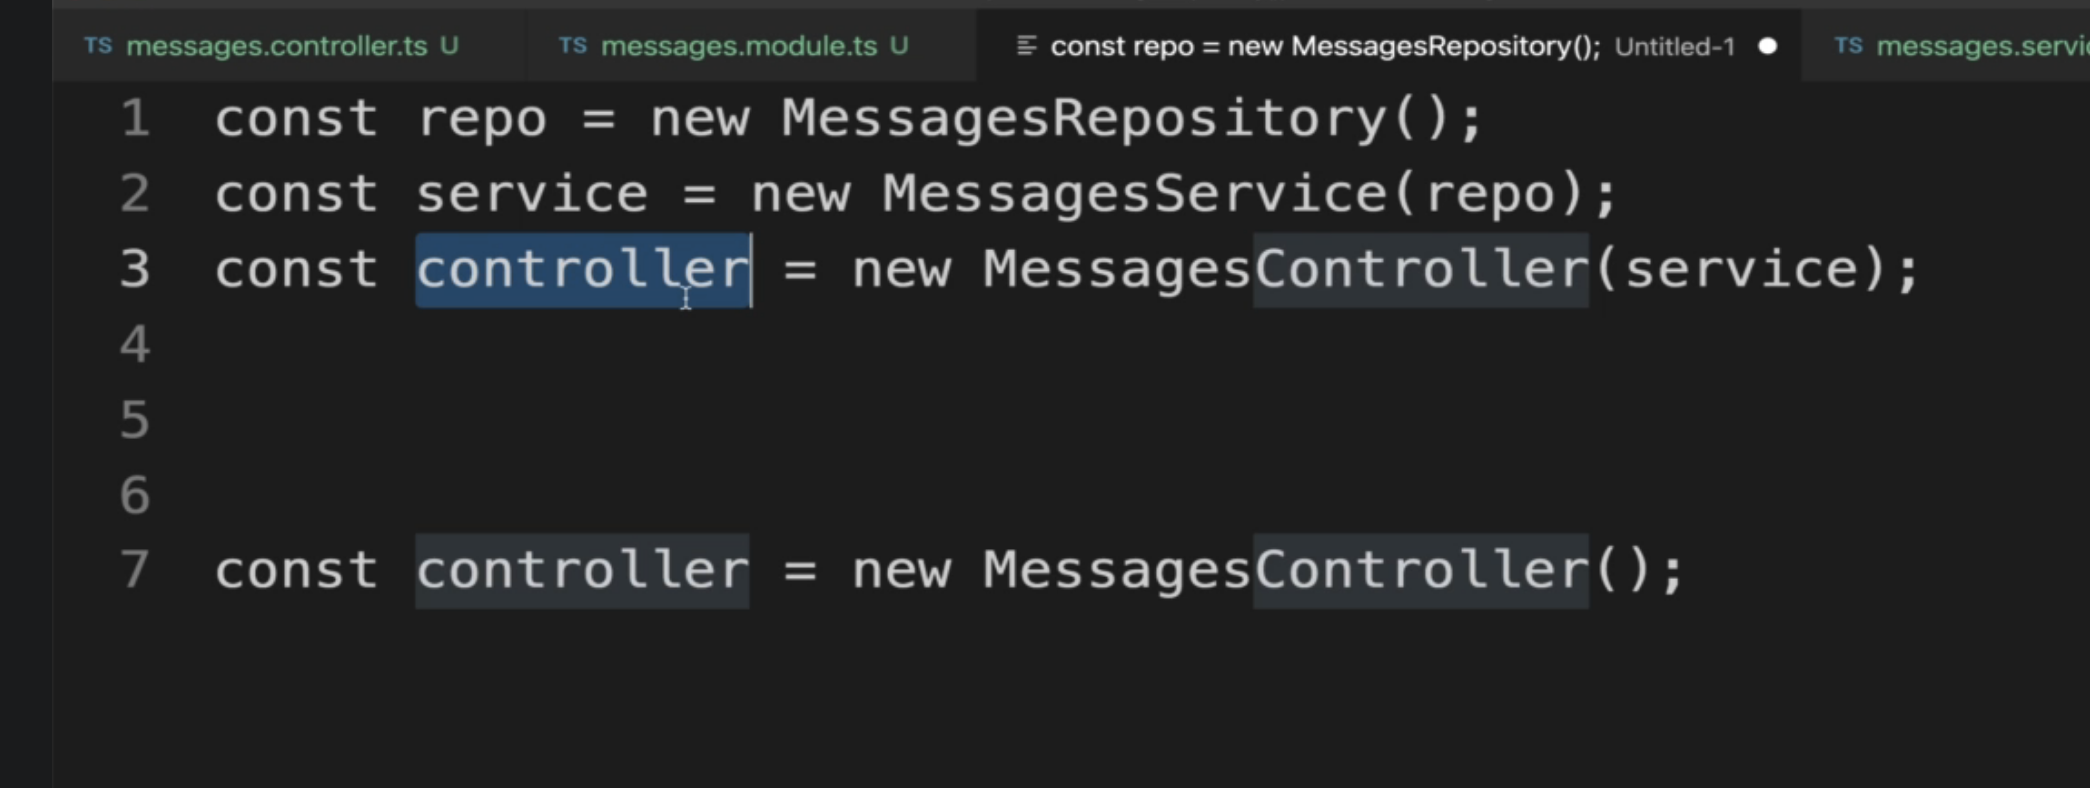
With this, it is very lengthy. We now need 3 lines to create one controller as opposed to the one line for the original code. This may multiply by many times when we add more services and controllers. To solve this problem, we introduce dependency injection
Dependency Injection
To solve the above problem and maintain inversion of control, we use this.
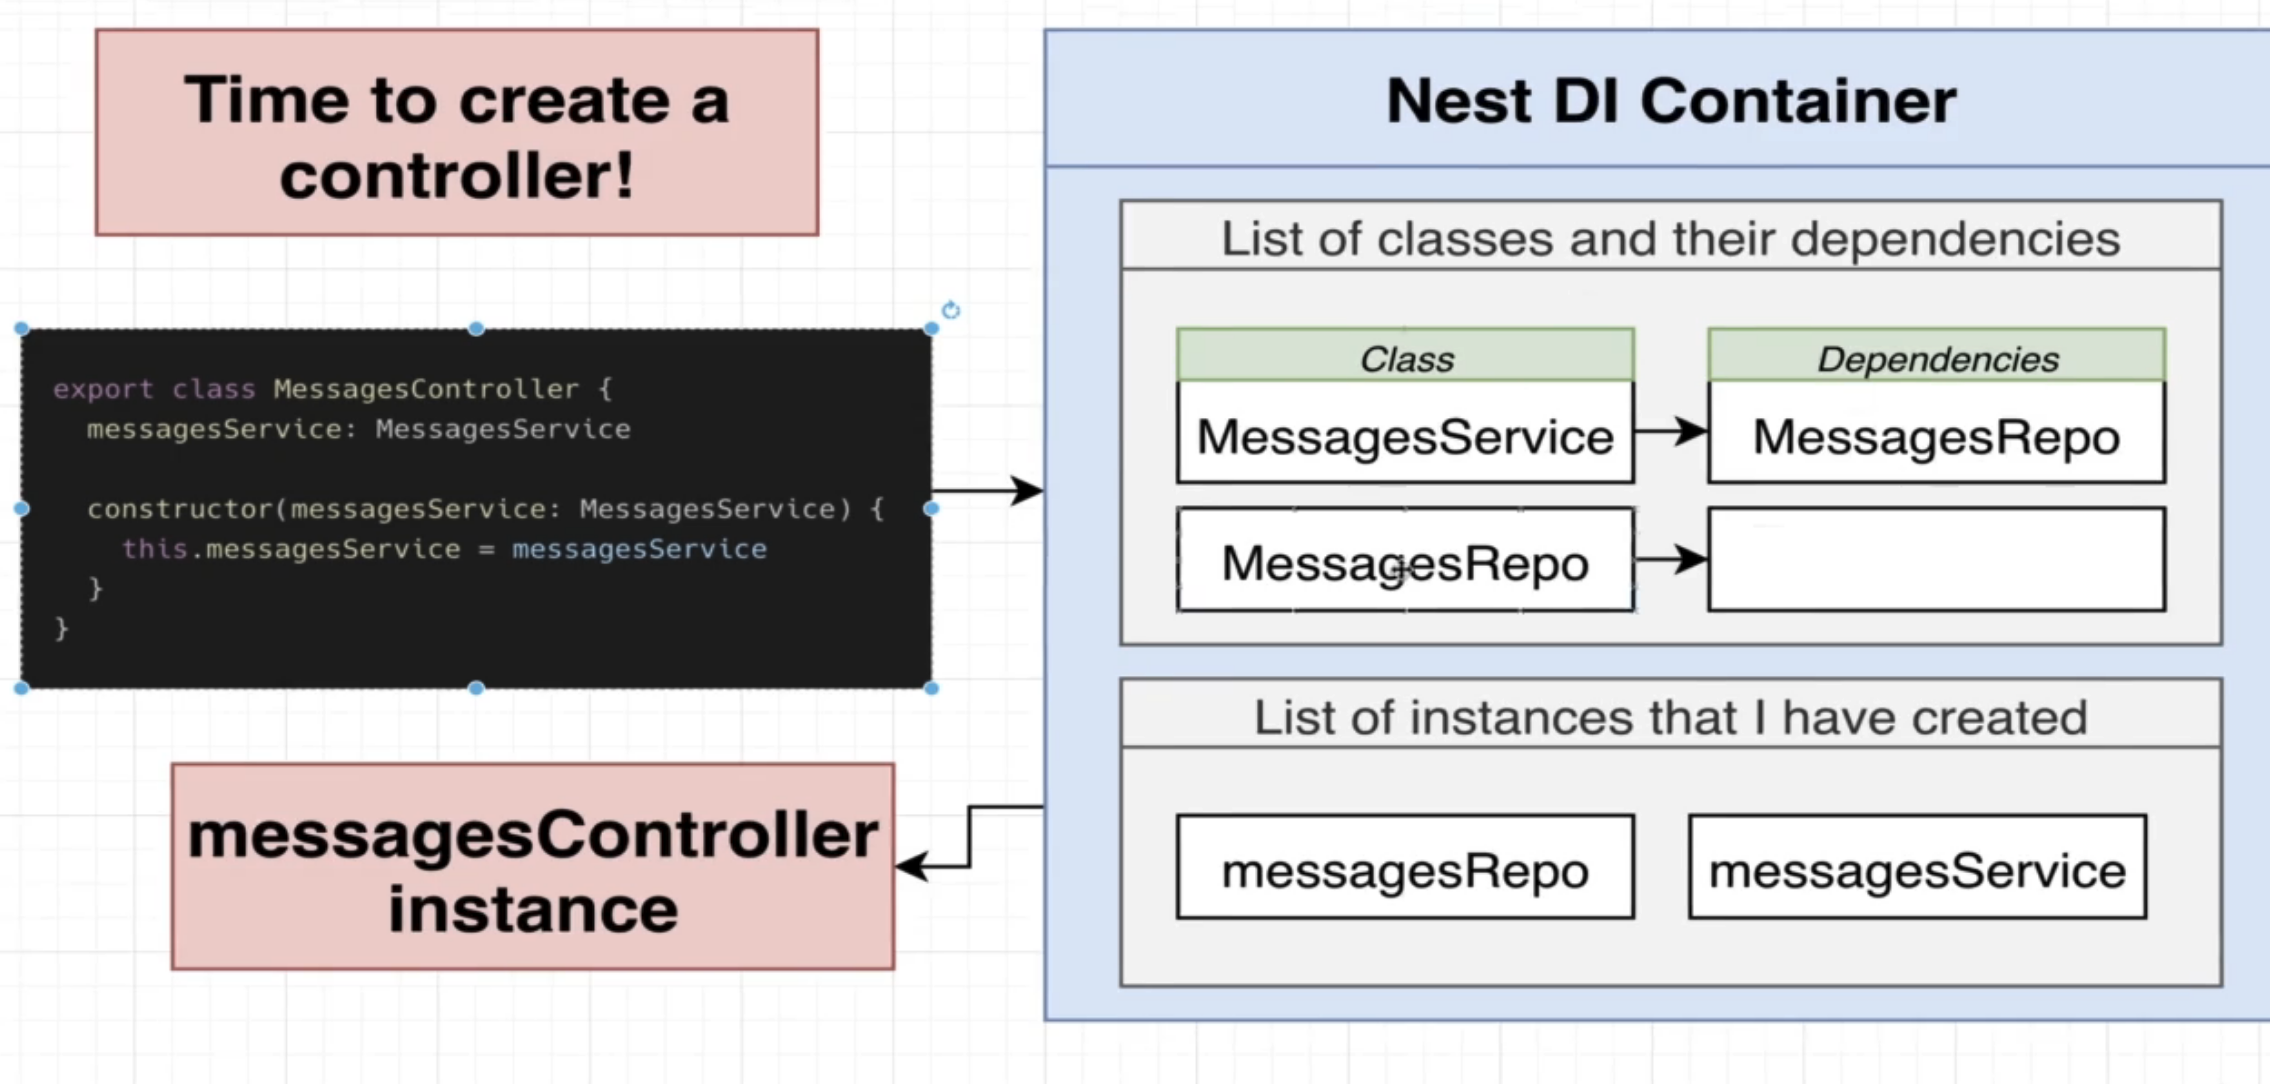
So, now that we know how the internals of dependency injection work, let’s refactor out code to use it. To see this, visit the project folder.